If you’re looking for something that’s soft, sweet, and comforting, you have to try making Japanese Sweet Rolled Omelet at home. This is one of those dishes that always reminds me of the pleasure of slowing down and enjoying the simple things.

I often make this rolled omelet for breakfast on weekends, or pack it in lunchboxes for my family. It’s just one of those timeless, quietly impressive little recipes that never gets old.
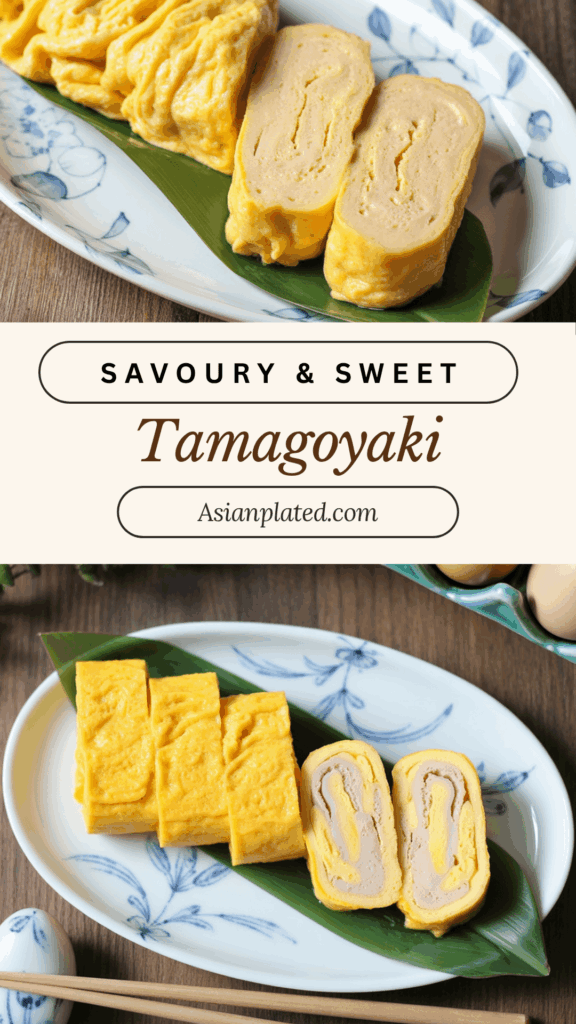
What is Tamagoyaki – The Rolled Egg We All Love
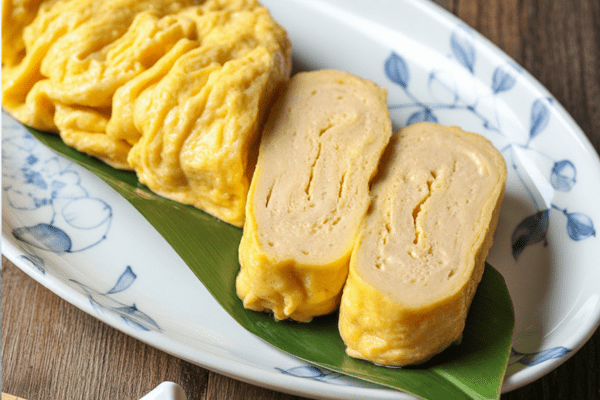
Tamagoyaki is that beautifully layered, slightly sweet rolled omelet you see in Japanese bento boxes. Think of it as the elegant cousin of our basic scrambled eggs.
I love how it holds its shape in neat slices, with each roll layered like a soft, golden cushion. It’s a staple in many Japanese homes, and once you get the hang of it, it’s honestly pretty fun to make.
It’s such a lovely way to make eggs feel special—without needing anything fancy.
Types of Tamagoyaki You Might Try
Basic Tamagoyaki
This is the simplest version, just seasoned egg without added stock or sugar. It’s where I started when I was learning. Great for practice.
Dashimaki Tamago
A more savory, delicate version that’s packed with dashi stock. It’s incredibly tender but can be tricky because the mix is quite liquidy. When I first tried it, I ended up with an egg puddle on my pan. Worth practicing, though.
Atsuyaki Tamago
This is my favorite—the sweet rolled omelet style that’s popular in Tokyo. It has less dashi so it’s easier to manage, but the sugar gives it this gentle, caramel-like aroma as it cooks. Just watch your heat so it doesn’t brown too fast.
Castella Tamago
A rich, cake-like variation sometimes served in sushi restaurants. It’s almost dessert-like, with a spongy texture. More involved, but quite a treat if you’re feeling adventurous.
My Go-To Ingredients for Sweet Tamagoyaki
What I like most about this recipe is how simple it is. You don’t need a giant list of ingredients to make something really tasty.
Here’s what I usually grab:
- Eggs – Always fresh. The better the egg, the brighter the color.
- Sweet Dashi (Kanro Dashi) – I make a small batch in advance and keep it in the fridge. It makes the prep so much quicker on busy mornings.
- Cooking Oil – A neutral oil works best. I like using just enough to coat the pan, so nothing sticks.
I think having that sweet dashi ready is half the battle. I usually make extra because it’s great in other simmered dishes too.
How I Make Sweet Dashi (Kanro Dashi)
Sweet dashi is this gorgeous golden stock that brings the omelet its signature flavor.
I like to simmer dashi with sugar, soy sauce, and a pinch of salt. Nothing complicated.
I usually make a jar over the weekend. That way, on a rushed weekday morning, I’m not fussing with stock—I can just focus on rolling those egg layers.
Leftover sweet dashi is too good to waste. I often splash it into braised vegetables or use it as a seasoning base for simmered dishes.
My Method for Making Sweet Rolled Omelet
Here’s how I usually do it, in my own kitchen:
- Make the Sweet Dashi
I prepare this ahead and keep it chilled. It saves so much time on a weekday. - Mix the Eggs
I go with about 1 tablespoon of sweet dashi per large egg. I try not to beat the eggs too much—just enough to combine the whites and yolks. Overbeating makes it foamy, which I find messes with the layers. - Cook and Roll
I heat my pan over medium-low. Pour a thin layer of egg, let it set just enough, then start rolling. Add more egg, roll again. It’s almost meditative. - Shape with a Sushi Mat
While still warm, I wrap it gently in a bamboo sushi mat. This step gives it that neat, rectangular shape that looks so professional. - Slice and Serve
I usually go for slices about an inch thick. If I’m packing it for a lunchbox, I might do smaller pieces so it fits nicely.
Honestly, it’s one of those things that looks fancy but is quite forgiving once you get into the rhythm.
Making Dashi – My Quick Options
I’ve tried all kinds of methods for dashi over the years.
- Kombu and Katsuobushi – The traditional method, rich and clean-tasting. About 20 minutes but so worth it.
- Vegan Dashi – Uses kombu and shiitake. My go-to when I’m making veggie dishes for friends.
- Dashi Packets – My weeknight hero. Just steep in water for a few minutes.
- Dashi Powder – The absolute fastest, though I use this only when I’m really pressed for time.
Most days, I’m all about the dashi packet. It strikes a nice balance between ease and good flavor.
Handy Tips from My Kitchen
- Keep Practicing
I’ve been making tamagoyaki since my early twenties, and even now I need to do a few practice rounds if I haven’t made it in a while. Don’t let a lopsided roll discourage you. - Adjust to Your Tools
Every stove and pan behaves differently. My first pan was a cheap nonstick that was a bit too thin, so I burned a few omelets before I learned the right heat setting. - Go Low and Slow
Don’t rush the layers. Let each set just enough so you can roll it tightly.
About the Pan – Do You Need a Special One?
I’ll be honest—I love my tamagoyaki pan. It’s rectangular and makes it so much easier to get those crisp edges.
Over the years, I’ve tried:
- Non-stick
- Copper
- Carbon steel
- Cast iron (my favorite—it heats evenly and holds steady once hot)
But you don’t have to buy one right away. I’ve used round frying pans plenty of times.
Sure, the shape won’t be as neat, and the layers can look a bit uneven on the ends. But it still tastes fantastic. If you’re using a round pan, just pour a bit more egg mix to help get better layers.
Serving Ideas from My Table
Tamagoyaki shines brightest in a simple, classic Japanese-style meal.
When I want to do it right, here’s what I usually serve alongside:
- Steamed rice
- Salted grilled salmon
- A small spinach salad with sesame dressing
- Japanese pickles
- A bowl of miso soup
Tamagoyaki (Japanese Rolled Omelet)
There’s something comforting and nostalgic about tamagoyaki—those golden, tender layers of sweet-savory egg, warm from the pan or chilled in a bento box.
Ingredients
For the Tamagoyaki:
- 4 large eggs
- 4 tablespoons sweet dashi
- 2 tablespoons neutral oil (such as vegetable or canola)
For the Sweet Dashi (makes about 1¾ cups):
- 1¼ cups dashi (you can use homemade or instant powder)
- ½ cup sugar
- 1½ teaspoons soy sauce
- 2 teaspoons kosher salt (preferably fine-grain)
Instructions
- Making the Sweet Dashi : Start by warming the dashi stock in a small saucepan over medium heat. Add in the sugar, soy sauce, and salt. Stir until everything is dissolved, but don’t let it boil. Once done, remove from heat and let it cool completely. Store it in a clean jar in the fridge for up to a week, or freeze in small portions—perfect for quick weekday tamagoyaki.
- Preparing the Egg Mixture : In a mixing bowl or large measuring cup, combine the eggs and sweet dashi. Gently break up the yolks with chopsticks or a fork and stir just enough to bring the whites and yolks together—no need to beat aggressively. The texture should be smooth and slightly elastic.
- Cooking the Tamagoyaki : Heat up a tamagoyaki pan (or a small rectangular pan) over medium heat. Dip a folded paper towel into the oil and lightly grease the pan, wiping away any excess.
- Pour a thin layer of the egg mixture into the hot pan—just enough to cover the surface. Pop any bubbles, and tilt the pan to ensure an even spread. Once the egg is set but still slightly soft, gently roll it toward you using chopsticks or a spatula.
- Push the roll to the far end of the pan, re-grease the exposed surface, and pour in the next layer of egg. Tilt the pan again so the new egg layer slides underneath the rolled portion.
- Repeat this layering process, rolling each time as the egg just sets. With each layer, the roll gets thicker and more structured. Depending on your pan size, you’ll end up with 4 to 6 layers.
- For the final layer, take your time. This is the one everyone will see, so make it count! Smooth out any air bubbles, gently roll, and shape the edges as it cooks.
Notes
- Finishing Touch: Shaping the Omelet
- Once fully rolled, transfer the tamagoyaki to a bamboo sushi mat while it’s still warm. Wrap it gently and let it rest for about 5 minutes. This helps it hold its shape beautifully.
- Unwrap and slice into even pieces. It’s delicious warm or at room temperature, and pairs wonderfully with grated daikon and a splash of soy sauce.
Nutrition Information:
Yield: 3 Serving Size: 1Amount Per Serving: Calories: 327Total Fat: 17gSaturated Fat: 3gTrans Fat: 0gUnsaturated Fat: 12gCholesterol: 249mgSodium: 1262mgCarbohydrates: 34gFiber: 0gSugar: 34gProtein: 11g
Asianplated.com, occasionally offers nutritional information for recipes contained on this site. This information is provided as a courtesy and is an estimate only. This information comes from online calculators. Although allchickenrecipes.com attempts to provide accurate nutritional information, these figures are only estimates.
If that sounds like too much for a weekday, no worries. Tamagoyaki on its own is a wonderful snack, or a bento highlight.
I often make it in the evening, slice it up, and tuck it in lunchboxes for the next day. It always brings a smile.
Try other Japanese recipes: