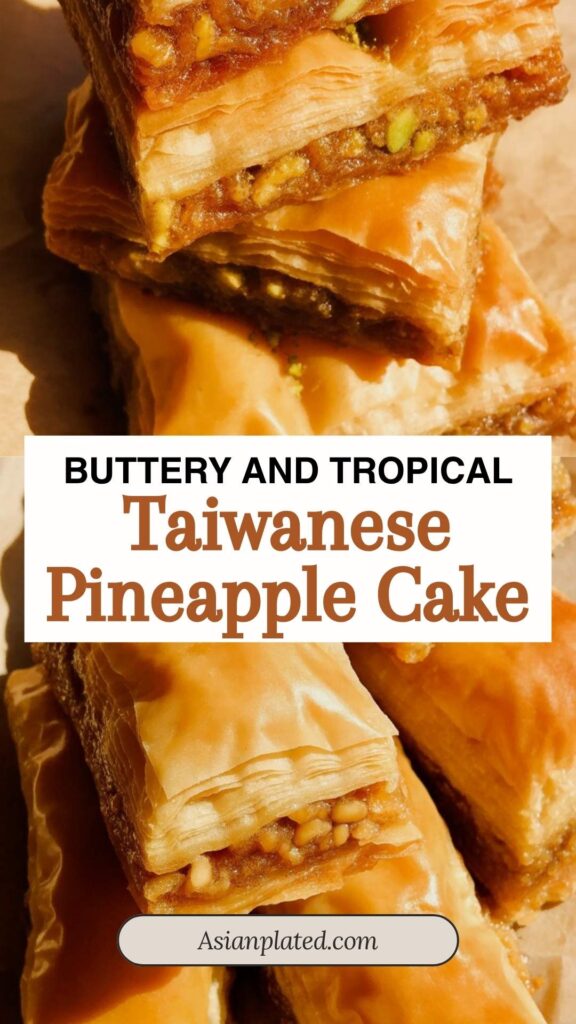
Forget the fiddly molds — this Taiwanese Pineapple Cake is all about big flavor with half the fuss. It’s baked as a whole and sliced into squares. Just as buttery and jammy, but so much easier to pull off at home.
Why This Pineapple Cake Stays on Repeat in My Kitchen
Alright, let me just say it — this might be one of my favorite bakes of all time. I know, big statement. But once you take that first bite into the buttery crust and hit that sticky pineapple filling, you’ll get it.
Now traditionally, Taiwanese pineapple cakes come in neat little rectangular blocks — usually made using individual molds. But honestly, who has time for all that shaping and pressing? This version skips the molds and uses one pan to bake the whole thing. You press, layer, bake, slice — done. Less mess, more cake.
This recipe is great whether you’re already a fan of Taiwanese desserts or you’re curious about what the fuss is all about. You’re in for a real treat either way.
So What Exactly Is Taiwanese Pineapple Cake?
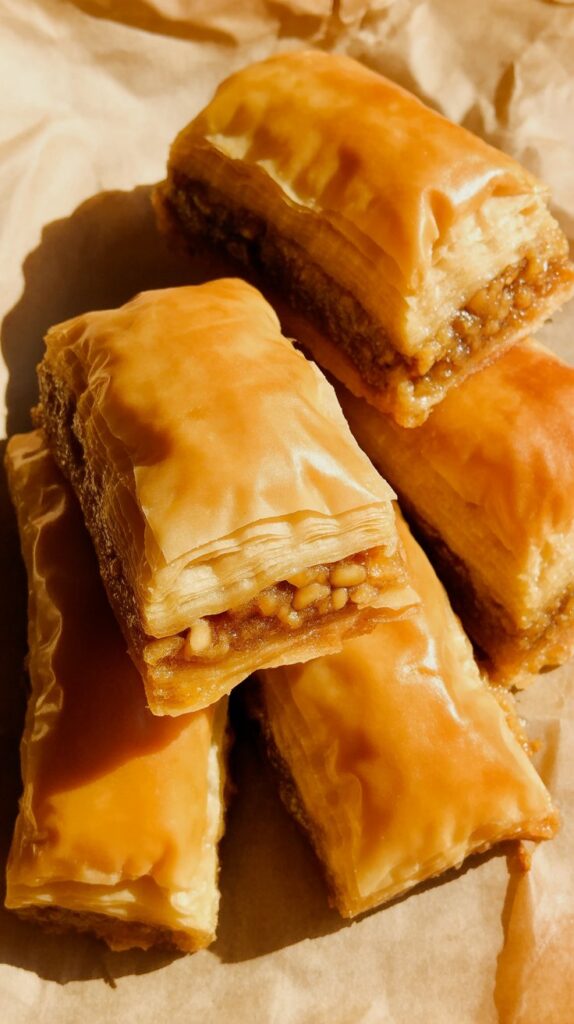
Despite the name, this isn’t a fluffy cake like you’d expect. It’s more like a pastry — somewhere between a soft shortbread cookie and a mini hand pie.
The outside is rich, crumbly, and buttery. The inside? A thick, jammy pineapple filling that’s slightly caramelized, slightly tart, and totally addictive. It’s a popular gift treat in Taiwan — I’ve tried plenty from Taipei airport gift shops to little corner bakeries in Tainan, and every one has its own personality.
This version doesn’t claim to be bakery-perfect, but it hits all the right notes for me — especially when I just want to whip up a tray without worrying about molds or perfection.
No Molds, No Problem: How the One Pan Method Works
If the idea of making individual pineapple cakes sounds too much, I hear you. I tried it once… and ended up with a sticky counter and half-formed cakes.
So I took inspiration from Japanese pan manju — another one-pan wonder — and applied that same logic here. You press half the dough into the base of a square pan, spread on the pineapple jam, top it with the rest of the dough, and bake it as a slab. Once cooled, slice it into thick bars or rectangles. It’s not traditional, but it works beautifully.
And bonus: it makes enough to share (or hoard — no judgment).
What You’ll Need for the Filling
Pineapple Jam That’s Worth the Effort
The star here is the jam, so don’t rush it. I go with canned crushed pineapple for convenience — it saves time and still tastes amazing. You’ll need two 20oz cans, but don’t be tempted to use it straight from the tin.
Here’s the trick: drain it really well — I mean squeeze it with your hands if you have to. You want the pineapple as dry as possible before it goes into the pan, otherwise your crust will end up soggy.
Then it’s just a matter of cooking it down with:
- Sugar
- Butter
- Maltose
That maltose is the game-changer. It gives the filling that rich, malty finish you’ve probably tasted in bakery-made pineapple cakes. I always grab a tub from my local Asian grocery store — it’s cheap, lasts forever, and I even use it in glazes for roast meats.
If you don’t have maltose? You can swap in honey or corn syrup. Just be sure to cut back or skip the sugar since they’re sweeter than maltose.
Customizing the Sweetness
Sweetness is personal — I get it. If you’re not big on overly sweet desserts, go ahead and reduce the sugar. The maltose still gives it body and flavor, so you won’t miss out too much.
That said, if you love that deep caramelized flavor (like I do), keep at least a bit of sugar in the mix. It’s worth it.
Making the Crust – Choose Your Texture
You’ve got two solid routes for the crust. Depends on what kind of bite you want.
Option 1: Buttery and Crisp
This version gives you a deeper golden color and a rich, almost pie crust-like texture. I use sweetened condensed milk and a touch of baking soda, and I always brush on an egg wash before baking for that bakery-style sheen.
It’s a little more crumbly and toasty — kind of like shortbread with an upgrade. This is the version I usually go for because I like that contrast against the soft jam.
Option 2: Soft and Tender
If you want a softer, cakier texture — something closer to what you’d find in store-bought pineapple cakes — use regular milk (or evaporated milk) and baking powder instead of baking soda. You can also skip the egg wash and just mix the egg into the dough after creaming the butter and sugar.
This version stays a little paler and bakes up with a more delicate crumb. Still delicious, just different vibes.
Helpful Tips Before You Start Baking
I’ve made this cake more times than I can count, so here are a few tricks I always follow:
- Roll out the top crust: Instead of trying to press it directly over the filling, roll it out between two sheets of cling film into a rough square, then flip it onto the pan. It saves you from a sticky mess and gives a more even top.
- Cool completely before slicing: I know it smells amazing fresh out of the oven, but resist cutting into it too soon. Once cooled, the crust firms up and you’ll get cleaner, neater slices that hold their shape better.
- Use parchment: Lining the pan makes it easier to lift the whole slab out before slicing. Makes cleanup easier too.
Serving Suggestions – How I Enjoy It
I love slicing this into thick bars and serving it with strong black tea — especially in the late afternoon when I need something sweet but not too heavy. It also packs well, so I’ve tucked it into lunchboxes and even brought it along for potlucks.
And because it keeps its shape so well, it’s perfect for gifting. Wrap a few slices in parchment and tie with string — trust me, people go nuts for homemade pineapple cake.
Storing Your Pineapple Cake
This cake keeps surprisingly well. I usually store mine in an airtight container at room temperature for up to 5 days. If your kitchen runs hot, keep it in the fridge instead — just bring it to room temp before eating for the best texture.
You can also freeze it! Just wrap slices tightly and freeze for up to a month. Thaw at room temp or give it a quick warm-up in the toaster oven.
Taiwanese Pineapple Cake

A simplified twist on the classic Taiwanese pineapple cake, this easy one-pan version layers a rich pineapple jam between two buttery cookie crusts.
Ingredients
For the Pineapple Filling
- 2 tablespoons unsalted butter
- 2 cans (20 oz each) crushed pineapple, well-drained
- ½ cup maltose (or substitute honey or corn syrup)
- ¼ cup granulated sugar
For the Crust
- 1 cup (2 sticks) unsalted butter, room temperature
- 1 cup granulated sugar
- 1 teaspoon kosher salt
- ½ teaspoon baking soda
- ¼ cup sweetened condensed milk
- 2½ cups all-purpose flour
- 1 egg, beaten (for brushing)
Instructions
- Start by prepping the pineapple filling. Drain the crushed pineapple in a fine-mesh strainer, gently pressing to remove excess juice. Set aside.
- In a wide skillet over medium heat, melt the butter. Stir in the drained pineapple, granulated sugar, and maltose. Cook the mixture down for 8–10 minutes, stirring frequently, until it thickens, deepens in color, and no liquid remains at the bottom. The filling should be jammy and golden. Remove from heat and let cool.
- While the filling cools, preheat your oven to 350°F (175°C). Lightly grease and line a 9×9-inch metal baking pan with parchment.
- In a large mixing bowl, cream the butter, sugar, salt, and baking soda together until the mixture is light and fluffy. Add the sweetened condensed milk and mix briefly. Stir in the flour just until a soft dough forms. Divide the dough into two equal parts.
- Press one half of the dough into the prepared pan, spreading it into an even layer that reaches all edges.
- Spoon about 1½ cups of the cooled pineapple filling over the bottom crust and gently spread it out. You’ll likely have a bit of filling left — perfect for toast or topping yogurt later.
- Flatten the second half of the dough between two pieces of plastic wrap into a square roughly the size of the pan. Carefully lift and place it over the filling. Press lightly so the top layer touches the edges.
- Brush the top with beaten egg and bake for 30–40 minutes, or until the surface turns golden brown and a toothpick poked in the center comes out clean.
- Let the cake cool completely in the pan. Once cooled, slice into bars or squares. Store leftovers in an airtight container in the fridge — they stay good for 3 to 5 days (if they last that long!).
Nutrition Information:
Yield: 20 Serving Size: 1Amount Per Serving: Calories: 145Total Fat: 2gSaturated Fat: 1gTrans Fat: 0gUnsaturated Fat: 1gCholesterol: 15mgSodium: 108mgCarbohydrates: 29gFiber: 1gSugar: 16gProtein: 2g
Asianplated.com, occasionally offers nutritional information for recipes contained on this site. This information is provided as a courtesy and is an estimate only. This information comes from online calculators. Although allchickenrecipes.com attempts to provide accurate nutritional information, these figures are only estimates.
Frequently Asked Questions
Can I use fresh pineapple instead of canned?
Yes, but it’s more work. You’ll need to grate or finely chop it, then cook it down until nearly all the moisture is gone.
Where do I find maltose?
Look in Chinese or Korean supermarkets — it’s usually in the baking or syrup section. Some online stores carry it too.
Can I make this dairy-free?
You could try using a dairy-free butter substitute for the crust and skip the sweetened condensed milk. The flavor will be a bit different but still tasty.
Do I need to refrigerate it?
Not if you’re eating it within a few days. But for longer storage, the fridge or freezer works great.
Try other Taiwanese recipes: