There’s something comforting about knowing you’ve got a stash of homemade steamed pork buns waiting in the freezer. On days when I don’t feel like chopping or even thinking about dinner, I grab a few of these baozi, steam them up, and suddenly it’s like I put effort into a proper meal.

These buns have saved me on tired weeknights, last-minute lunches, and even one too many late-night cravings. And the best part? They’re easier to make than most people think—especially once you stop stressing about perfect pleats.
Why I Always Keep a Batch in the Freezer
Some folks swear by frozen pizza or ice cream as their must-have. Me? I need my freezer to have steamed rice, frozen dumplings, and at least one tray of these pork buns tucked in the back. They’re my backup dinner, my travel snack, and sometimes even breakfast when I want something savory and satisfying.
Making them from scratch lets you control everything—from how juicy the filling is to how much meat you pack in. And honestly, they freeze better than most takeout versions. Just steam and go.
No Need to Master Fancy Pleats
Let’s be honest—pleating buns is an art, and most of us don’t have the patience to perfect it. Good news? You can skip it entirely.
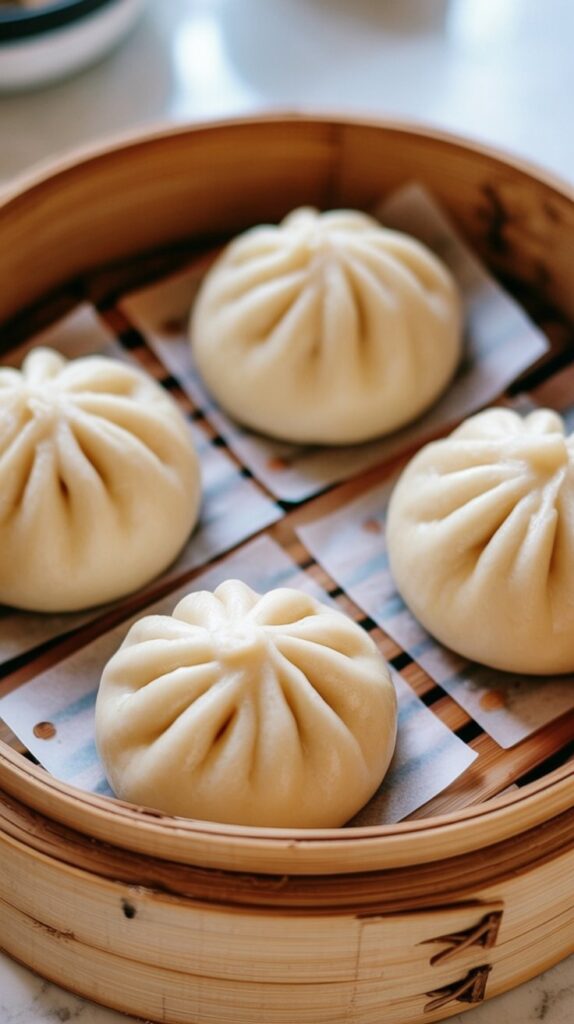
I used to struggle with making every fold look identical until I realized I could just pinch the top closed and flip the bun over. The result? Smooth, round buns that look bakery-ready with none of the pressure. And if you’re wondering whether there’s a rule about savory buns being pleated and sweet ones being smooth… forget it. These are your buns. Do what works.
A Simple Trick for Sealing Without Tears
One tip I’ve learned the hard way: don’t let your fingers get wet while sealing. If the dough gets damp from the filling or your hands, it becomes impossible to close cleanly. Dry hands and a little flour on the surface make all the difference between a neat seal and a soggy mess.
A Quick Word on the Pork Filling
Sure, you can buy pre-ground pork. I do it too when I’m short on time. But if you ever have a few extra minutes and a sharp knife, hand-chopping your own meat makes a big difference. The texture is chunkier and juicier—closer to what you’d find in a really good dim sum restaurant.
All you need is a cutting board, a heavy knife, and a few minutes. I find it oddly satisfying and always worth it for the flavor payoff.
How I Make the Dough
Start by dissolving some yeast and sugar in warm water. I usually use a large mixing bowl because it gives me space to knead without making a mess. Once the yeast gets foamy, I gradually add flour and knead until the dough turns soft and smooth. It should be easy to handle—neither sticky nor stiff.
If I’m using my stand mixer, I let it knead while I prep the filling. Otherwise, I knead by hand and always aim for that smooth, springy texture that reminds me of soft pillows.
Then I cover it with a damp cloth and let it rise for an hour. If my kitchen’s cold, I sometimes let it proof in the oven with the light on.
Making the Juicy Pork Filling
While the dough’s rising, I get to work on the filling. I start by mixing a splash of water into the pork—this helps keep it extra moist. Then I sauté ginger and onions in oil until everything smells rich and fragrant.
Once that’s ready, I toss in the pork and stir constantly until it loses its pink color. Don’t bother browning it—just cook it through. Then comes the flavor bomb: dark soy sauce, oyster sauce, a bit of wine, sesame oil, sweet bean paste, and a pinch of sugar. The combination makes the filling rich, savory, and just slightly sweet.
To thicken it up and avoid soggy buns, I stir in a little cornstarch slurry and let it bubble for a minute. Once it cools down, I mix in chopped scallions for some fresh bite.

Time to Shape and Fill
After the dough has puffed up, I give it a quick knead to push out any air bubbles. Then I divide it into equal portions—usually around 20 buns, each weighing about 48–50 grams.
Here’s a little trick: roll the dough circles so the edges are thinner than the center. That way, when you close the buns, the filling sits comfortably in the middle without breaking through.
For filling, start small if you’re new to folding. I usually use one hand to cup the dough and the other to pleat and turn. It takes a few tries, but you’ll get there. Or—like I mentioned earlier—skip the pleating and just pinch and flip.
Once filled, I place each bun on a parchment square and let them rest again for 15 minutes while I prep the steamer.
Steaming Without Fuss
I use a bamboo steamer with multiple levels so I can cook more at once. You can also use a metal steamer or even a makeshift setup with a pot and colander—whatever you’ve got.
Just make sure the buns aren’t sitting in water. I brush the steamer base with oil or use parchment to keep them from sticking. Napa cabbage leaves also work great.
Start the steaming with cold water in the pot. Once the heat’s on, I steam the buns for 15 minutes. Then, and this part matters—turn off the heat and let them sit for another 5 minutes before lifting the lid. Skipping this step can make the buns deflate, and no one wants that.
How I Store and Reheat Leftovers
If you somehow have buns left, let them cool completely and pop them in an airtight container. They’ll last a few days in the fridge or a few weeks in the freezer.
To reheat from the fridge, I usually just microwave for a minute or two, covered with a damp paper towel. But steaming always brings them back to life—5 minutes from chilled, about 8 from frozen.
Steamed Pork Buns (Baozi)
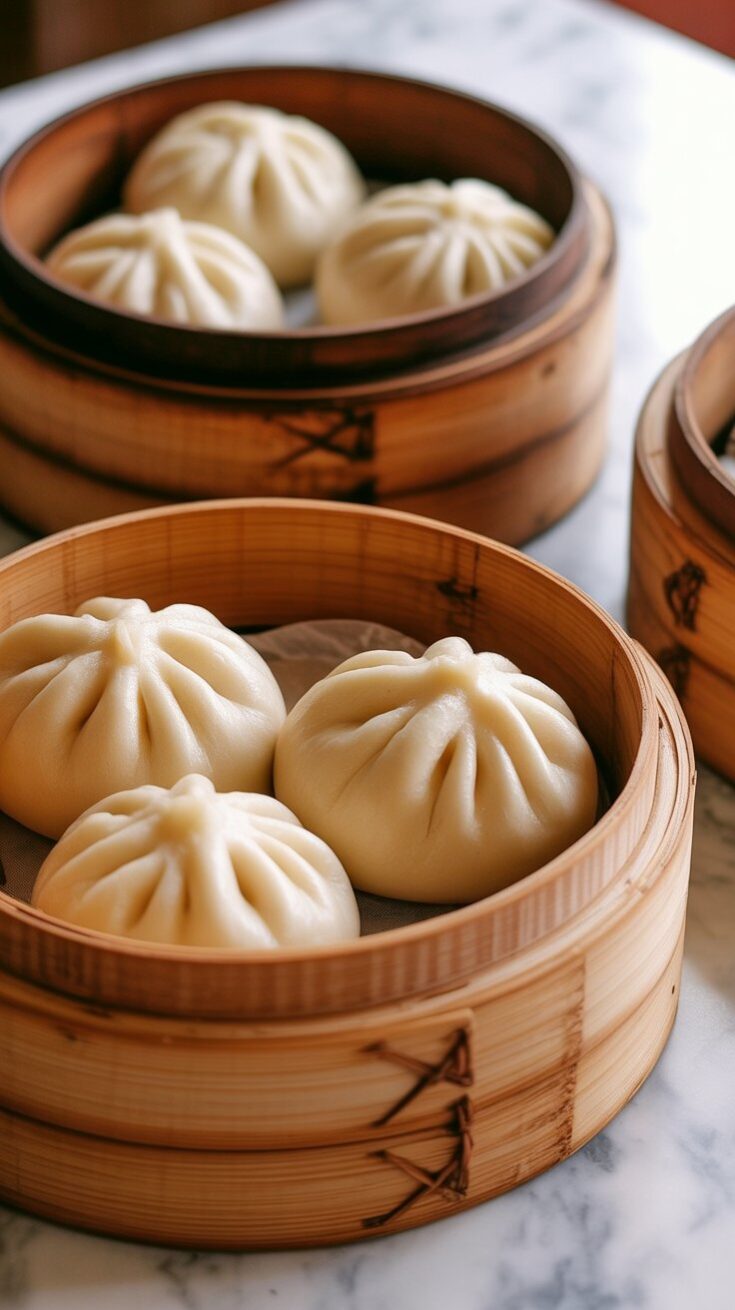
There’s something undeniably comforting about biting into a soft, fluffy steamed bun filled with juicy pork and savory aromatics.
Ingredients
For the Dough
- 1½ cups lukewarm water (355 ml)
- 5g active dry yeast (about 1½ teaspoons)
- 8g granulated sugar (2 teaspoons)
- 580g all-purpose flour (about 5 cups), plus more for kneading
For the Filling
- 700g ground pork (about 1½ lbs; ground chicken or beef also works)
- 2 tablespoons ground bean sauce
- 1 tablespoon oyster sauce
- 2 tablespoons minced ginger
- 1 tablespoon sweet bean sauce (or hoisin sauce)
- 1 tablespoon dark soy sauce
- 2 tablespoons Shaoxing wine (or dry sherry)
- 1 teaspoon sugar
- ½ teaspoon white pepper
- 3 tablespoons water
- 3 tablespoons vegetable oil
- 1 large onion, finely chopped
- 2 teaspoons sesame oil
- 1½ teaspoons cornstarch mixed with 1 tablespoon water
- 3 scallions, finely chopped
Instructions
- Making the Dough : Start by combining the yeast and sugar in lukewarm water in a large mixing bowl. Let it sit for about 10–15 minutes until the mixture gets frothy—this means your yeast is ready.
- Slowly mix in the flour, adding it half a cup at a time while kneading the dough. Keep working it for about 15 minutes until smooth and elastic. You want a soft dough—neither sticky nor stiff. Form it into a ball, cover with a damp towel, and let it rise in a warm spot for about an hour. While that’s happening, you can prepare the filling.
- Preparing the Pork Filling : In a large bowl, add the ground pork and stir in 3 tablespoons of water until it’s fully absorbed.
- Heat a wok or skillet over medium-high heat until lightly smoking. Pour in the vegetable oil, then add the ginger and chopped onions. Sauté until the onions are soft and fragrant.
- Stir in the pork and cook just until it turns pale and opaque—no need to brown it. Add in the Shaoxing wine, soy sauce, sweet bean sauce, ground bean sauce, oyster sauce, sugar, white pepper, and sesame oil. Keep the heat high and stir everything together until combined and fragrant.
- Cook off any excess moisture, then stir in the cornstarch slurry. Let it bubble for about a minute to thicken. Turn off the heat and allow the mixture to cool. Once cooled, stir in the scallions.
- Assembling the Buns : Once the dough has proofed, punch it down and knead briefly to remove air. Divide it into 20 equal portions—each piece should weigh about 48g to 50g.
- Roll each piece into a disc, making sure the center is slightly thicker than the edges. Scoop a bit of the cooled filling into the center.
- Now for the fun part: pleating! Hold the dough in one hand and use the other to pleat the edges all the way around, sealing the bun at the top. Place each finished bun onto a small square of parchment paper on your steamer tray. Let them rest, covered, for about 15 minutes before steaming.
- Not confident with pleats? No worries—just gather the dough edges and pinch to seal, then place seam-side down. Let proof 15 minutes before cooking.
- Steaming the Buns : Arrange the buns in your steamer, spaced slightly apart. Start with cold water in the steamer pot and bring it up to a simmer over medium heat.
- Steam the buns for 15 minutes, then turn off the heat but don’t open the lid yet. Let the buns sit, covered, for another 5 minutes so they don’t collapse from sudden temperature changes.
- Storing and Reheating : Let the buns cool completely, then store them in an airtight container. They’ll keep in the fridge for a few days or can be frozen for later.
- To reheat refrigerated buns, microwave for 1–2 minutes or steam for 5 minutes. For frozen buns, steam straight from frozen for about 8 minutes—no need to thaw.
Nutrition Information:
Yield: 20 Serving Size: 1Amount Per Serving: Calories: 251Total Fat: 10gSaturated Fat: 3gTrans Fat: 0gUnsaturated Fat: 6gCholesterol: 33mgSodium: 154mgCarbohydrates: 26gFiber: 1gSugar: 2gProtein: 13g
Asianplated.com, occasionally offers nutritional information for recipes contained on this site. This information is provided as a courtesy and is an estimate only. This information comes from online calculators. Although allchickenrecipes.com attempts to provide accurate nutritional information, these figures are only estimates.
Final Thoughts
There’s nothing like tearing into a warm steamed pork bun with the filling still juicy and steaming inside. These baozi have become one of those recipes I never get tired of making—and I always regret not making more. They freeze beautifully, taste better than takeout, and let you pack all your favorite flavors inside.
Whether you’re folding like a pro or just flipping them over and calling it a day, these buns are all about comfort. Make a batch, freeze a bunch, and thank yourself later when dinner’s ready in 10 minutes.
Try other Chinese recipes: