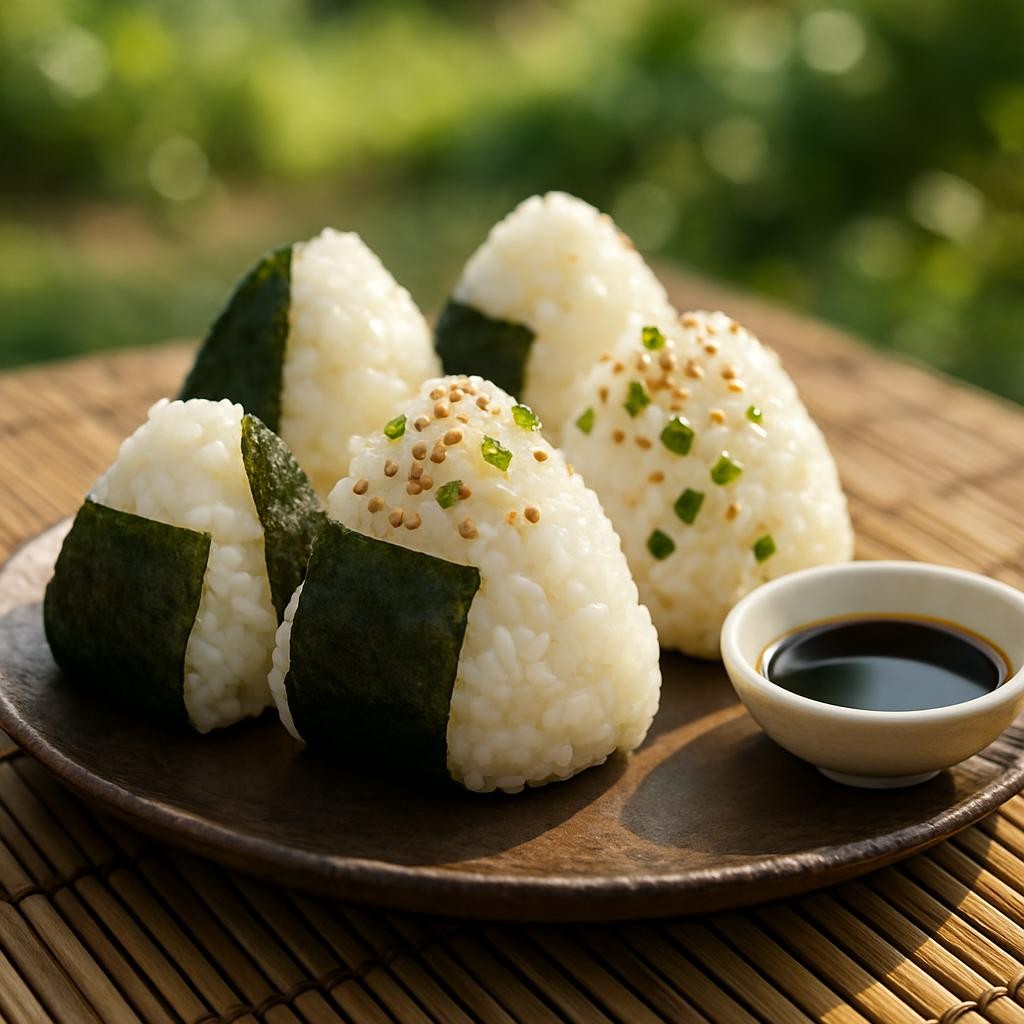
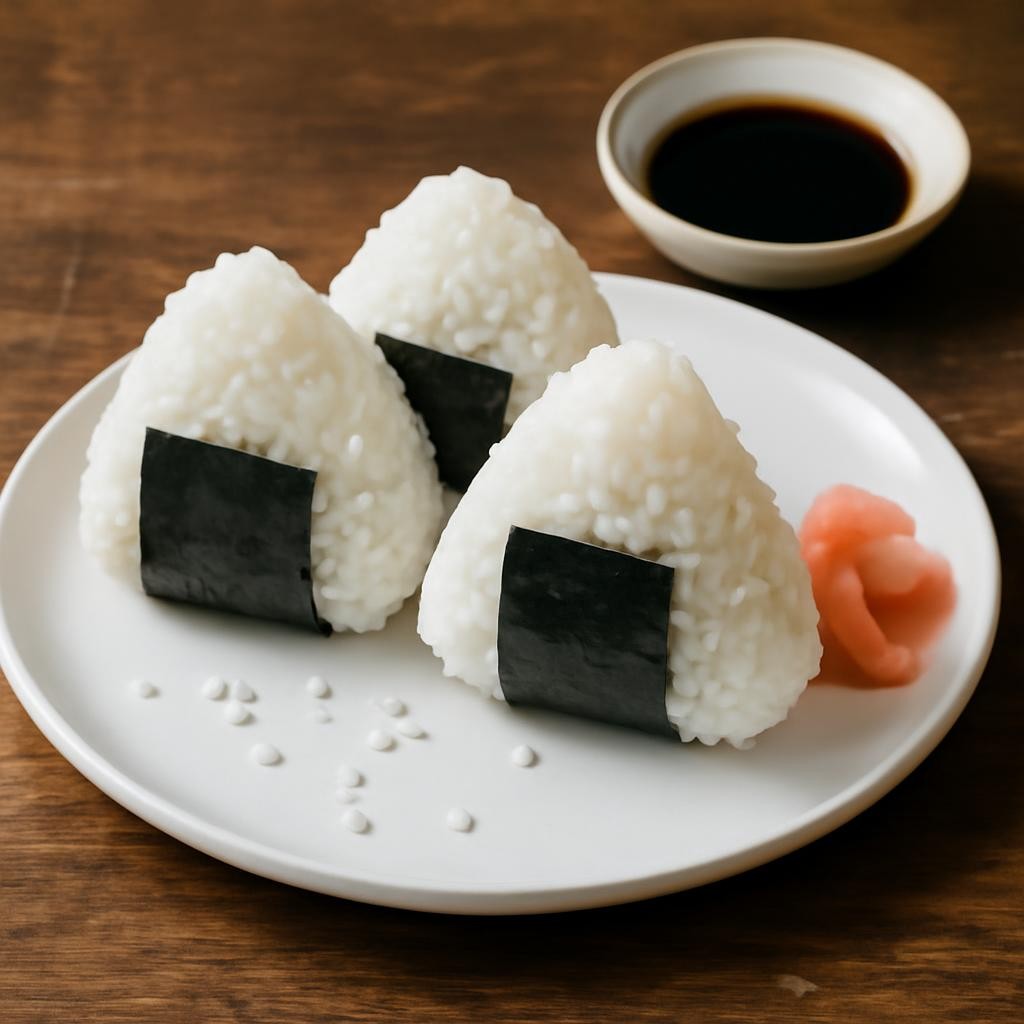
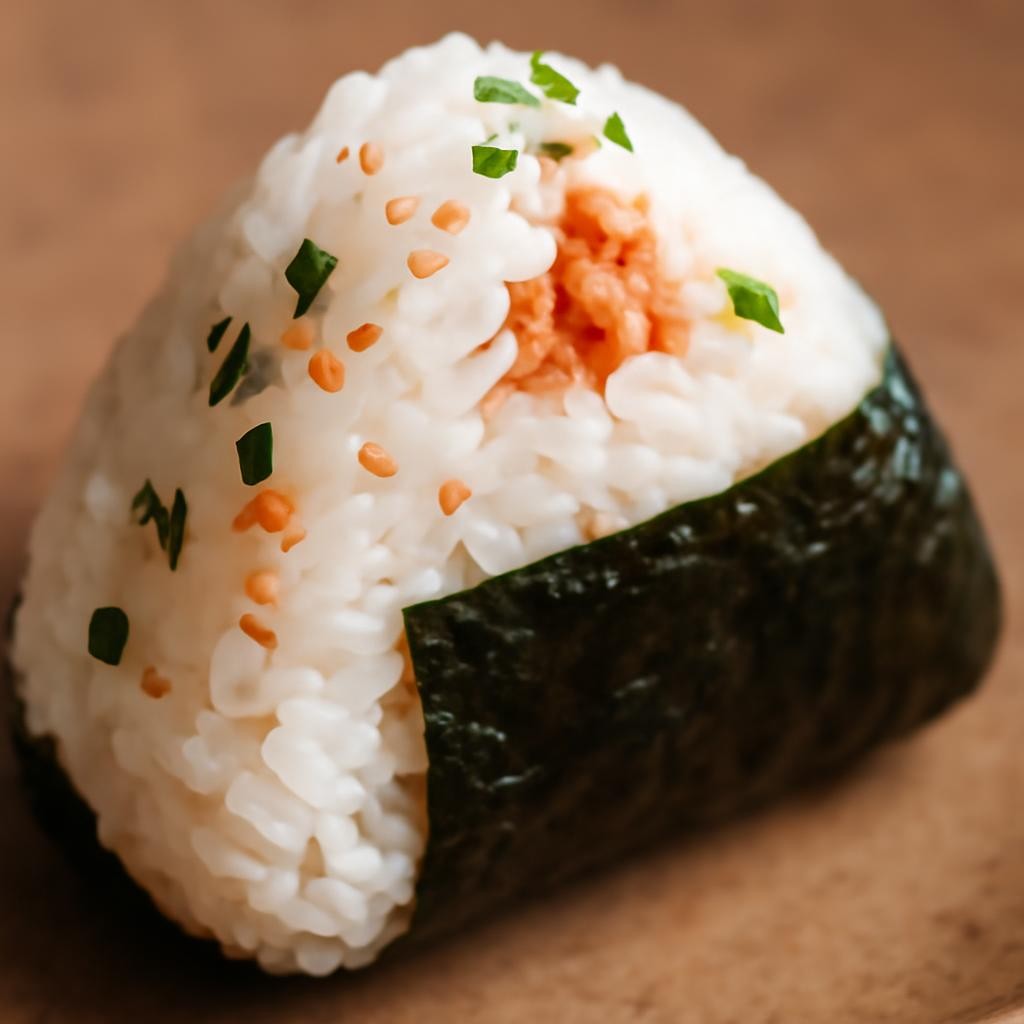
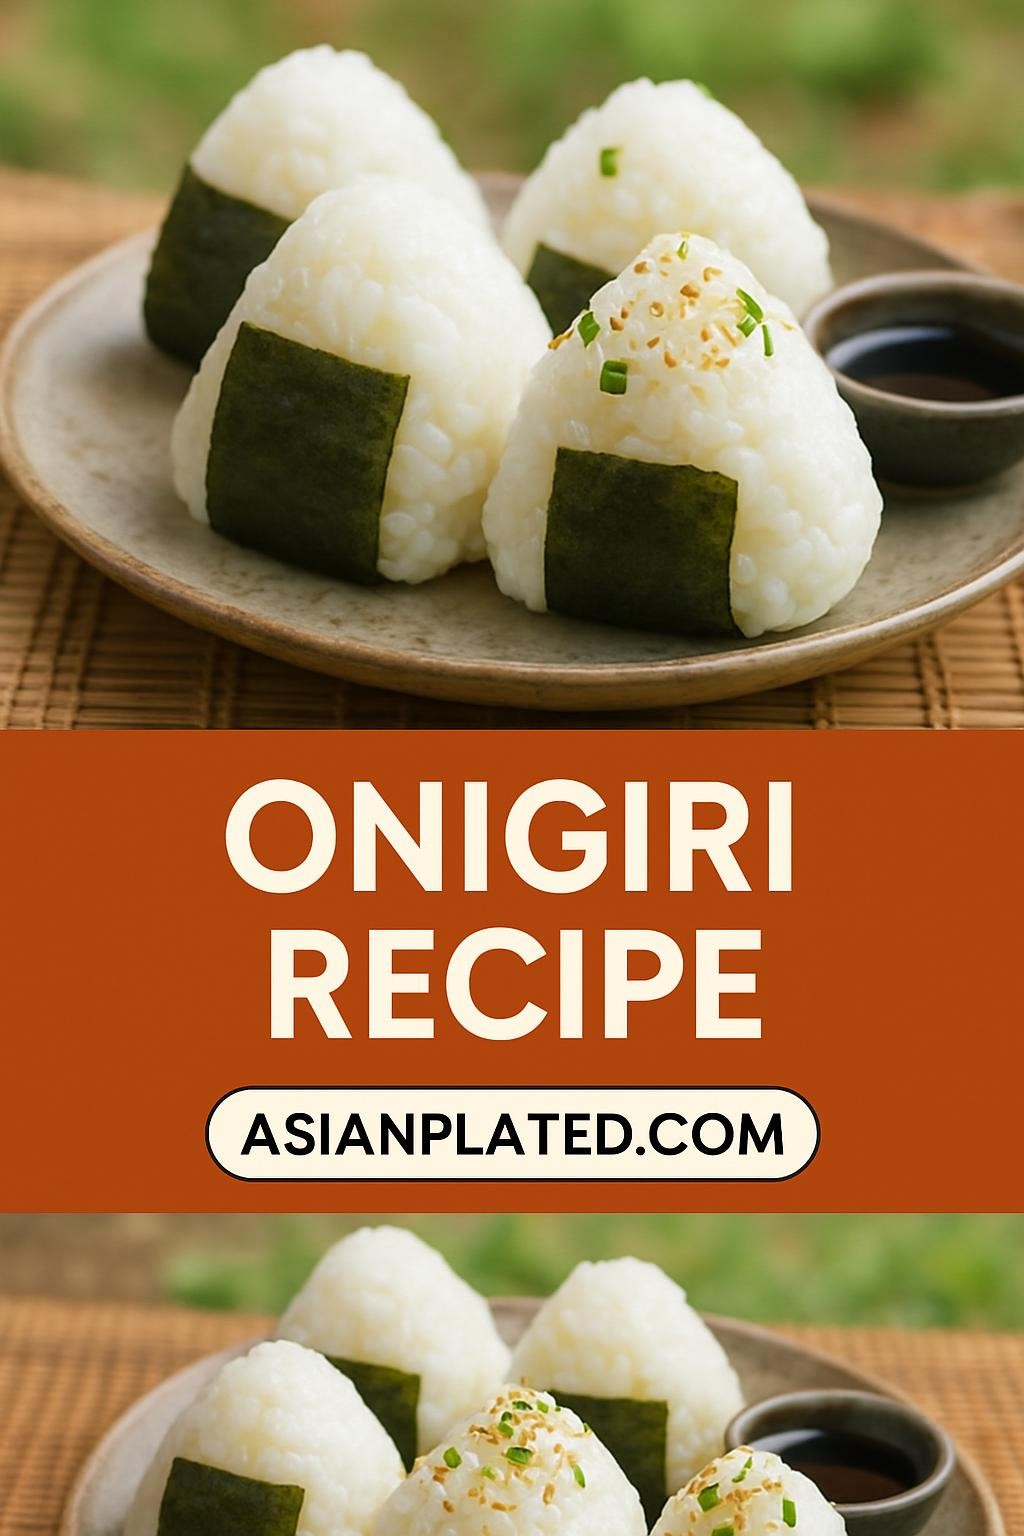
Onigiri , or Japanese rice balls, are a delightful and versatile dish that showcases the beauty of simple ingredients. These tasty morsels, typically wrapped in nori and filled with various fillings, are perfect for lunchboxes, picnics, or quick snacks. Their appealing shape and customizable flavors make them a favorite among many food enthusiasts. With a combination of seasoned rice and a choice of savory fillings, onigiri is not only delicious but also a fun culinary project that invites creativity.
Why You Will Love This Recipe
You will adore this onigiri recipe for several reasons. First, the flavor combinations are limitless; whether you prefer classic fillings like umeboshi (pickled plum) or crave something heartier like teriyaki chicken, there’s an onigiri for every palate. The preparation is straightforward, making it accessible even for novice cooks. Additionally, onigiri fits a variety of dietary lifestyles, being naturally gluten-free and easily adaptable to vegan or vegetarian diets. This recipe encourages you to play with textures and tastes, ensuring that each bite is a delightful experience.
Tips and Tricks
To ensure your onigiri turns out perfectly, here are some tips and tricks:
- Choose the right rice: Short-grain Japanese rice is ideal for onigiri as it becomes sticky when cooked, making it easier to shape.
- Keep your hands wet: Dipping your hands in water while shaping the rice will prevent it from sticking and make it easier to mold.
- Season the rice: Mixing in a bit of salt or rice vinegar enhances the flavor of the rice, making your onigiri even tastier.
- Experiment with fillings: Don’t be afraid to try unique fillings like avocado, pickled vegetables, or even leftover meats.
Make Ahead Tips
Meal prepping onigiri is a breeze! You can prepare the rice a day in advance and store it in an airtight container in the refrigerator. The fillings can also be made ahead of time—just ensure they’re stored separately until you’re ready to assemble the onigiri. Once formed, onigiri can be kept fresh in the fridge for about 2 days, but it’s best to enjoy them on the same day for optimal taste and texture.
Recipe Variations
Get creative with these onigiri variations:
- Filling Swaps: Instead of traditional fillings, try spicy tuna, grilled vegetables, or even cream cheese for a fusion twist.
- Seasoned Rice: Add ingredients like furikake (Japanese rice seasoning) or sesame seeds to the rice for added flavor.
- Shape Changes: Instead of the classic triangle, try rolling your rice balls into a cylinder or using molds for fun shapes.
How to Serve
Serve your onigiri with a side of soy sauce for dipping or a sprinkle of furikake on top for extra flavor. You can also garnish with sliced green onions or sesame seeds for a pop of color. For an authentic touch, serve them on a wooden platter or bamboo mat to showcase their beauty.
Pairing Suggestions
Enhance your onigiri experience with these pairing suggestions:
- Drink Pairings: Cold sake or green tea complements onigiri beautifully. For a non-alcoholic option, try iced matcha.
- Side Dishes: Pair with a side of miso soup or a refreshing seaweed salad to round out your meal.
- Desserts: Finish with a light dessert, like mochi or matcha-flavored treats, for a satisfying conclusion to your meal.
How to Store
To store leftovers, place any uneaten onigiri in an airtight container in the refrigerator. They will stay fresh for up to 2 days. If you plan to freeze them, wrap each onigiri tightly in plastic wrap and then place them in a freezer-safe bag. They can be frozen for up to a month. To reheat, allow them to thaw in the fridge overnight, then microwave briefly to restore warmth.
Equipment Needed
You won’t need any special tools to make onigiri, but having a rice cooker can simplify the rice-cooking process. If you don’t have one, a pot or stove will work just fine. Consider using a plastic wrap or onigiri mold to help shape your rice balls if you prefer.
Dietary Adaptations
Making onigiri suitable for various dietary needs is easy:
- Vegan: Substitute meat fillings with sautéed mushrooms, tofu, or avocados.
- Gluten-Free: Ensure that any sauces or fillings used are gluten-free.
- Nut-Free: Avoid any nut-based fillings and choose safe alternatives like vegetables or protein options.
Seasonal Adaptations
Onigiri can be customized based on seasonal ingredients:
- Spring: Incorporate fresh peas or cherry blossom-flavored fillings.
- Summer: Use seasonal vegetables like zucchini or cherry tomatoes.
- Fall: Try fillings with roasted pumpkin or mushrooms.
- Winter: Fill with hearty ingredients like braised meats or winter greens.
Recipe FAQs
- Can I substitute the rice?: While short-grain rice is best for onigiri, you can use sushi rice as an alternative.
- How long does it take to cook rice for onigiri?: Cooking rice typically takes about 20 minutes, depending on your method.
- What are good filling options?: Popular fillings include pickled plum, tuna salad, teriyaki chicken, or grilled veggies.
- Can onigiri be made in advance?: Yes, onigiri can be made ahead of time but are best enjoyed fresh.
Onigiri

Onigiri , or Japanese rice balls, are a delightful and versatile dish that showcases the beauty of simple ingredients.
Ingredients
- 2 cups short-grain Japanese rice
- 2 ½ cups water
- 1 teaspoon salt (for seasoning the rice)
- 4 sheets nori (seaweed), cut into strips
- Your choice of filling (e.g., umeboshi, tuna, teriyaki chicken, avocado)
Instructions
- Rinse the short-grain rice under cold water until the water runs clear. This removes excess starch.
- In a rice cooker or pot, combine the rinsed rice and water. Cook according to your rice cooker instructions or bring to a boil, then simmer covered for about 18-20 minutes.
- Once cooked, let the rice sit covered for an additional 10 minutes to steam.
- Fluff the rice with a fork and stir in salt while it's still warm.
- Allow the rice to cool slightly, until it's warm but manageable to handle.
- Wet your hands and take a handful of rice, about ¼ cup, and flatten it slightly in your palm.
- Place about a teaspoon of your chosen filling in the center and mold the rice around it, shaping it into a triangle or ball.
- Wrap a strip of nori around the bottom or sides of the onigiri, if desired.
- Repeat with the remaining rice and fillings.
- Serve immediately or store as instructed.
Nutrition Information:
Yield: 8 Serving Size: 1Amount Per Serving: Calories: 68Total Fat: 0gSaturated Fat: 0gTrans Fat: 0gUnsaturated Fat: 0gCholesterol: 0mgSodium: 269mgCarbohydrates: 15gFiber: 0gSugar: 0gProtein: 1g
Asianplated.com, occasionally offers nutritional information for recipes contained on this site. This information is provided as a courtesy and is an estimate only. This information comes from online calculators. Although allchickenrecipes.com attempts to provide accurate nutritional information, these figures are only estimates.
Final Thoughts
Making onigiri is not just about feeding your hunger; it’s an opportunity to explore flavors and textures in a fun and interactive way. With endless possibilities for fillings and accompaniments, this recipe encourages creativity and is perfect for sharing with friends and family. Whether enjoyed at home or on-the-go, onigiri will undoubtedly become a beloved dish in your culinary repertoire. So gather your ingredients, unleash your inner chef, and enjoy this delightful Japanese classic!