Sometimes, when I’m craving a quick, punchy meal that doesn’t skimp on flavor, kimchi fried rice is the dish I turn to. There’s just something unbeatable about the way spicy, tangy kimchi and smoky bacon weave together with fluffy rice. This is the type of meal I throw together after a long day, especially when I see that almost-empty jar of kimchi in the fridge and realize dinner can be both thrifty and delicious.
")
Let me walk you through not just how to make it, but why it honestly became one of my must-have weeknight staples.
Why This Kimchi Fried Rice Works So Well
This dish is like a blank canvas for your favorite flavors, but here’s what keeps me coming back to it:
- Quick and filling: Even on my busiest evenings, I can have this ready in about 20 minutes. It’s great for a solo dinner, but scales up easily if friends come over.
- Uses leftovers: That bit of rice from last night’s curry, or the bacon I didn’t use up at breakfast—they all find a purpose here.
- Big flavor, small effort: The magic really happens when kimchi, bacon, and a splash of kimchi juice meet the heat. You don’t need a cupboard full of ingredients to get something incredibly satisfying.
My Tips for the Best Results
I’ve made a lot of fried rice over the years—sometimes brilliant, sometimes a little soggy. Here’s what has made all the difference for me:
- Older kimchi is better: The funkier and more fermented it gets, the more depth and tang you’ll get in your fried rice. If your kimchi is on the mild side, add a dash of rice vinegar to bring that sharpness.
- Day-old rice: This isn’t just tradition—it really gives the best texture. If your rice is just cooked, spread it out on a plate and let it cool for 10-15 minutes first.
- Bacon makes everything better: There’s just something about the smokiness that ties the whole dish together. But you can switch it up; leftover ham, sausage, or even spam work great.
- Don’t rush the stir fry: Let the bacon render its fat and get a little crispy—that’s your flavor base. Only add the kimchi after the bacon is half cooked, so all those spicy juices mingle with the meat.
Ingredients: Notes from My Kitchen
- Kimchi: Use napa cabbage kimchi, and don’t forget to save that precious juice at the bottom of the jar. The funkier, the better.
- Rice: Short or medium-grain white rice is traditional and sticks together just enough. Long grain tends to be drier but still gets the job done if that’s all you have.
- Bacon: I go for streaky bacon for those delicious, fatty bits, but turkey bacon or even vegetarian bacon can be swapped in.
- Eggs: Sunny side up is my favorite because that runny yolk adds an extra layer of richness. But go with whatever makes you happy.
- Sesame oil and seeds: These little touches make a huge difference for nutty aroma.
- Optional veggies: I love throwing in enoki mushrooms or whatever is left lurking in my vegetable drawer—carrots, bell peppers, even spinach.
- Garnishes: Roasted seaweed strips and green onions are my favorites, but sometimes I go minimal, just with a sprinkling of sesame seeds.

Everyday Serving Ideas
Kimchi fried rice is solid on its own, but if you want to make it a feast or just use up what’s in the fridge, here’s how I serve it:
- Topped with a runny egg, letting the yolk mingle with the spicy rice.
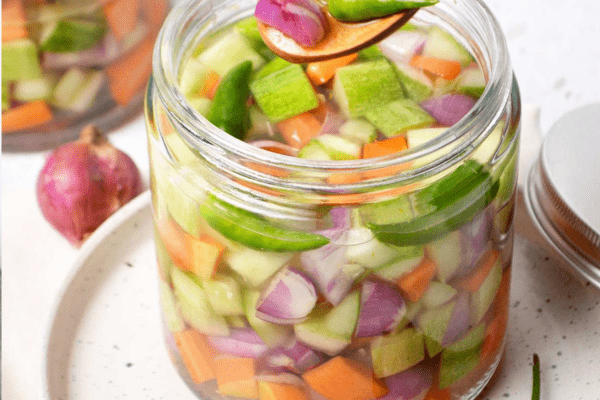
- On the side, some cool cucumber slices or a simple miso soup to round out the heat.
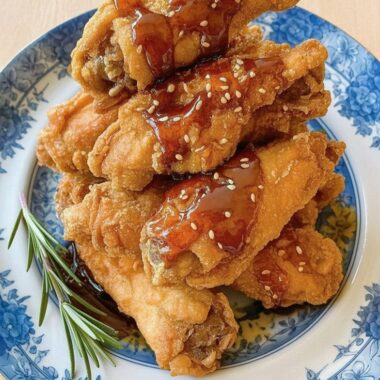
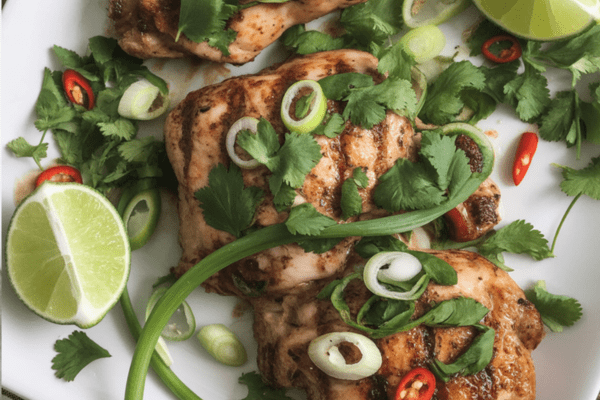
- If you’re hosting, serve with some grilled spicy chicken skewers or crispy tofu bites on the side.
It’s also the kind of dish that brings people to the kitchen just from the smell alone—I’ve had neighbors follow their noses to my door more than once!
Keeping Leftovers and Reheating
If you make a big batch, stashing leftovers for lunch the next day is always a win.
- Fridge: Pop into a sealed container and refrigerate for up to three days. A quick sizzle in a hot pan or a quick zap in the microwave brings it back to life.
- Freezer: I’ve frozen portions in small bags and they hold up quite nicely for about a month. When reheating from frozen, add a splash of water and heat gently to avoid drying the rice out.
Quick Questions I Get About Kimchi Fried Rice
Can I make it without bacon?
Yes! Swap in mushrooms, diced tofu, or even plant-based bacon alternatives. The dish is just as satisfying (and a little lighter).
Is it very spicy?
That depends completely on your kimchi and if you add more chili. I usually don’t add gochujang unless I want some real heat, but even then, the dish is bold but not overwhelming.
Do I have to use kimchi juice?
It’s where so much of the flavor comes from, but if you’re running low, a splash of soy sauce and a spoonful of chili paste can boost the flavor too.
What do I do if my kimchi’s not sour enough?
Stir a little rice vinegar into your kimchi juice for that extra tang.
Kimchi fried rice has become my busy day hero meal, the perfect blend of comfort food and quick fix. The best part? No two batches are ever exactly the same, and that’s where the fun is. Give it a try with what you have—I promise it’ll bring a little extra spark to your table.
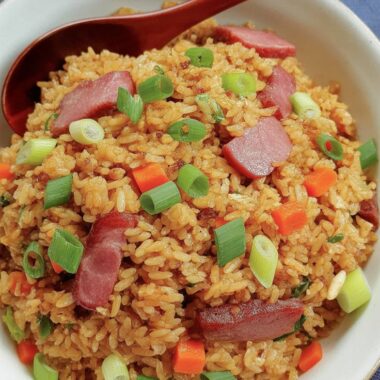
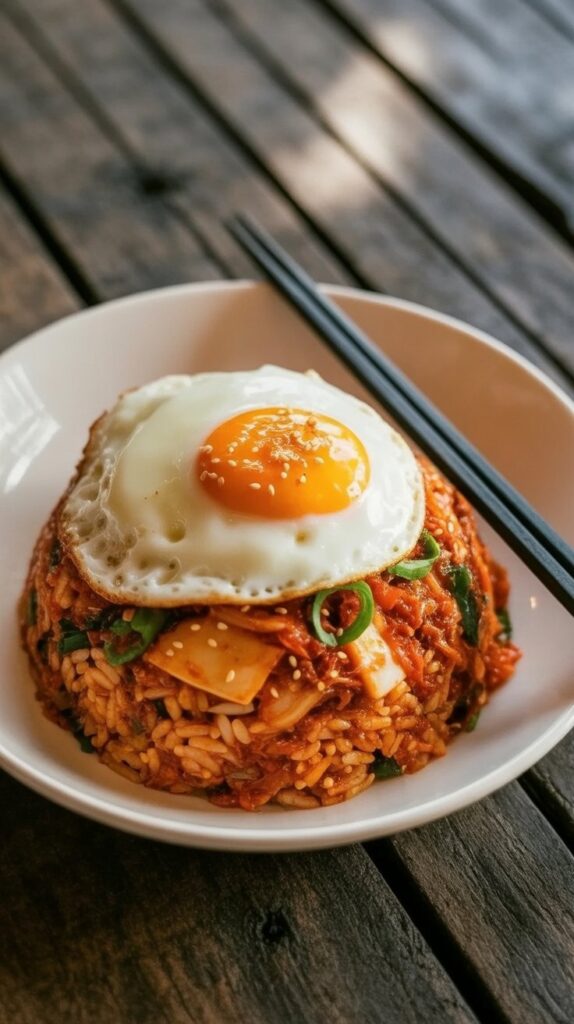
Kimchi fried rice (Kimchi-bokkeumbap)

If you’re craving a plate of pure comfort with a punch of flavor, you have to try this Kimchi Fried Rice (Kimchi Bokkeumbap)!
Ingredients
- 3 cups cooked short- or medium-grain rice, cooled slightly
- 150 g bacon (about 5.3 ounces), cut into bite-size pieces
- 1 cup kimchi, chopped into small pieces
- 1 pack enoki mushrooms (200 g/7 ounces), roots removed, rinsed, and drained (optional)
- 1/2 teaspoon minced garlic
- 1/4 cup kimchi juice
- 1 tablespoon cooking oil
- 1/2 tablespoon sesame oil
- 4 large eggs, cooked sunny side up (or to your liking)
- 1 tablespoon toasted sesame seeds (for garnish)
- 1/2 stalk green onion, thinly sliced (for garnish, optional)
- Roasted seasoned seaweed, shredded (for garnish, optional)
Instructions
- Get the pan ready: Heat a generous swirl of cooking oil in a skillet or wok over medium-high until shimmering.
- Sizzle the aromatics: Drop in the minced garlic and stir for about 10 seconds just until fragrant.
- Add the bacon: Toss the bacon pieces into the pan, stirring until they’re browned and just halfway done.
- Kimchi time: Add in the chopped kimchi and sauté together until the kimchi is softened and fragrant—about 2 to 3 minutes.
- Toss in mushrooms (optional): If you’re using enoki mushrooms, add them now and stir briefly until just wilted. Lower the heat slightly to medium.
- Add rice and season: Crumble in the rice and pour over the kimchi juice. Stir well, ensuring everything is evenly mixed and heated through.
- Finish with sesame oil: Drizzle in the sesame oil, tossing well to coat everything with that rich nutty aroma. Remove from the heat.
- Serve it up: Spoon the fried rice onto plates or bowls. Top each serving with a freshly cooked sunny side up egg, then sprinkle with sesame seeds, green onions, and seaweed if you like.
- Dig in and enjoy!
Notes
- Well-fermented (older) kimchi gives the deepest flavor. If yours isn’t quite there, add a splash of rice vinegar for tang.
- If short on kimchi juice, add a bit of gochujang for heat, or soy sauce for a milder option.
Nutrition Information:
Yield: 4 Serving Size: 1Amount Per Serving: Calories: 396Total Fat: 24gSaturated Fat: 7gTrans Fat: 0gUnsaturated Fat: 16gCholesterol: 223mgSodium: 973mgCarbohydrates: 22gFiber: 1gSugar: 8gProtein: 21g
Asianplated.com, occasionally offers nutritional information for recipes contained on this site. This information is provided as a courtesy and is an estimate only. This information comes from online calculators. Although allchickenrecipes.com attempts to provide accurate nutritional information, these figures are only estimates.
Try other Korean recipes: