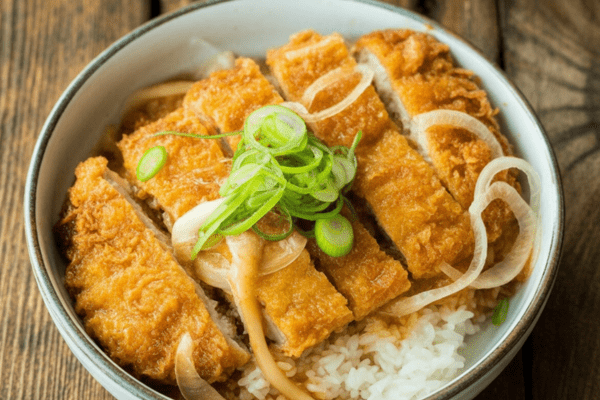
If you’re craving true comfort in a bowl, this is it. Katsudon is one of those dishes I make when I want to feel like I’m back in a small diner in Japan, surrounded by the savory aroma of simmering dashi and sweet onions. It’s warm, filling, and has this beautiful balance of crispy pork, soft egg, and rice all soaking up a flavorful broth.
")
This is the meal I turn to on chilly nights, or when someone in the family needs cheering up. Best of all, it’s easier than you might think to make at home.
What is Katsudon?
Katsudon combines two words: “katsu” for breaded cutlet and “don” for rice bowl. It’s one of the most beloved donburi dishes in Japan, and for good reason. You get the crunch of a freshly fried pork cutlet, softened slightly by being gently simmered in a sweet-savory broth with onions, then finished with silky, barely set egg.
It’s the kind of meal you find everywhere in Japan—from home kitchens to train station diners. When I make this at home, the whole house smells like that inviting mix of dashi and caramelized onion that you just can’t replicate with anything else.
Why I Love This Recipe
Easy to prep ahead
I’ll often fry the pork cutlets the day before, or even keep them in the freezer. That way, when dinner time rolls around, I just make the broth, warm the cutlets, and cook the rice. Perfect for busy evenings.
Layers of texture
This is what makes katsudon special. You bite in and get the crisp of the breading, the tender pork inside, the sweet, melting onions, and the silky egg all on top of fluffy rice. Every spoonful is different.
Total comfort food
It’s my go-to for “I’ve had a long day” meals. One big bowl of katsudon feels like a warm hug. The one-bowl format also means less cleanup, which always feels like a win to me.
Ingredients for Katsudon
Here’s what I use:
- Tonkatsu (breaded pork cutlet): I make this from scratch, but if you have leftover katsu or even store-bought, use it. The broth will bring it back to life.
- Onion: I like yellow onions for their sweetness.
- Eggs: Room temperature helps them cook evenly.
- Green onion: For a fresh pop at the end.
- Dashi: I usually use a dashi packet because it’s quick and still has that classic flavor.
- Sugar, Mirin, Soy Sauce: The sweet-salty base that defines this broth.
- Cooked Japanese short-grain rice: Freshly cooked if possible, but reheated leftovers work too.
Ingredient tip: If I have the time, I’ll make dashi from scratch with kombu and bonito flakes. It’s simple but really deepens the flavor.

Substitutions
Dashi:
If you’re in a rush, dashi powder is fine. But if you have a bit more time, making it with kombu and bonito is worth it. I sometimes make a big batch and freeze portions for easy meals.
Mirin:
If I’m out, I’ll mix sake (or water) with sugar in a pinch. It’s not exactly the same, but it still gives the broth that gentle sweetness.
How to Make Katsudon
Preparation
Step 1 – Make the dashi.
I keep this part easy: water plus a dashi packet, simmer, then remove. It smells so savory while it simmers—like being in a little ramen shop.
Step 2 – Slice the aromatics.
Thin slices help the onion cook quickly and evenly. I like green onions for a finishing touch—they add freshness and color.
Step 3 – Prep the eggs and tonkatsu.
I beat the eggs lightly so they stay a little marbled when cooked. Cutting the tonkatsu into thick slices helps it stay juicy even after simmering.
Cooking
Step 4 – Simmer the onions.
This is my favorite part. The onions soften in the dashi and pick up all the umami flavor. I make sure they’re really tender—this is what gives the broth its sweetness.
Step 5 – Season the broth.
Soy sauce, mirin, sugar—all the classic flavors. It’s sweet, savory, and smells incredible.
Step 6 – Warm the cutlets.
I lay the sliced tonkatsu right on top of the onions. This gently reheats them while they soak up the broth.
Step 7 – Add the eggs.
I drizzle the beaten eggs over everything and cover just until they set. You want them soft and slightly runny—it’s what makes the dish so luxurious.
Assemble
Step 8 – Serve.
Scoop hot rice into bowls, then carefully lay the tonkatsu, onions, and egg on top. I like to spoon a little extra broth over it so the rice soaks up all the flavor. A sprinkle of green onion on top is the finishing touch.
It’s such a complete meal—no extra fuss required.
My Recipe Tips
- Don’t overcook the egg: I give it just enough time to barely set. It keeps the texture silky and luscious.
- Be patient with the onions: Cooking them slowly until translucent makes them sweet and lets them carry the broth’s flavor.
- Good dashi matters: Whether homemade or a high-quality packet, dashi is the backbone of this dish. It’s what gives katsudon its unmistakable taste.
Variations and Customizations
I love that katsudon is easy to adapt:
- Baked version: If I don’t want to deep-fry, I bake my katsu instead. Still delicious with less mess.
- Swap proteins: Chicken katsu works beautifully here, especially if you’re cooking for kids.
- Gluten-free: Use gluten-free breadcrumbs for the katsu and gluten-free soy sauce in the broth.
- Plant-based: Tofu katsu and vegetable broth work great. I’ve even done it with eggplant katsu for a fun twist.
What to Serve with Katsudon
This is a complete meal on its own, but I like to round it out with a couple of sides:
- Miso soup: Always classic. The savory broth is a natural pairing.
- Salad with Japanese dressing: The crisp, fresh veggies balance the richness.
- Japanese pickles: Their acidity cuts through the sweet-savory flavors. I love having a small dish of them on the side.
- Tonkatsu sauce: A light drizzle can add extra tang and depth.
Storage and Reheating Tips
I usually store leftovers in separate containers: rice in one, tonkatsu in another, and broth separately if there’s extra. This keeps everything from getting too soggy.
- Fridge: Up to 3–4 days.
- Freezer: The katsu freezes well for about a month.
Reheating tip: I prefer reheating the tonkatsu in the oven so it stays a little crispy. Then I simmer it quickly in fresh broth with egg before serving. It’s almost as good as fresh.
Katsudon (Japanese Pork Cutlet Bowl)
There’s nothing quite like the comfort of a warm, savory bowl of katsudon to soothe a busy day.
Ingredients
For the Broth:
- 1 cup water
- 1 dashi packet (or your choice of awase dashi, powder, or vegan-friendly version)
- 2 teaspoons sugar
- 2 tablespoons mirin
- 2 tablespoons soy sauce
For the Katsudon:
- ½ onion, thinly sliced
- 3 large eggs
- 2 pork cutlets (deep-fried tonkatsu, or swap with chicken katsu if you like)
- 2 portions of cooked Japanese short-grain rice
- 1 scallion, finely sliced (for garnish)
Instructions
- Start with the Broth - In a small saucepan, combine 1 cup of water with a dashi packet. Bring it to a gentle boil over medium heat. Once it starts bubbling, lower the heat and let it simmer for 2 minutes. Give the packet a gentle shake while it simmers—this helps release extra flavor. Discard the packet once done. This is your umami-rich foundation.
- Prep Your Ingredients - Thinly slice half an onion. A fine slice ensures it softens quickly and melds into the broth. For the eggs, crack them into a bowl and gently cut through the whites with chopsticks a few times—don’t whisk! This keeps the beautiful contrast between yolks and whites when cooked. Slice your cooked tonkatsu into thick, satisfying pieces. Set your scallion aside for garnish.
- Cook It All Together - Place your sliced onions in a wide pan and pour in the freshly made dashi broth. Cover and cook over medium heat until the onions are soft and translucent. Then, stir in sugar, mirin, and soy sauce.
- Now, gently nestle the pork cutlets over the onions. Cover again and let them warm through—this lets the bottom soak up the flavorful broth.
- Once hot, slowly pour the eggs in a spiral motion over the pork and onions. Avoid the edges of the pan to keep the eggs from overcooking. Cover again and let the eggs steam until they’re barely set and still slightly runny—that’s the magic texture.
- Time to Serve - Scoop a generous portion of rice into two large bowls. Carefully lift the tonkatsu-egg-onion mixture and lay it over the rice. Spoon over some of the remaining broth for extra flavor. Top with a handful of scallions and serve immediately while everything is warm and fragrant.
Notes
- Leftovers? Store them in an airtight container in the fridge for up to 3–4 days.
- Want to lighten things up? Try baked tonkatsu or swap pork for chicken.
- If you’re new to dashi, there are plenty of ready-made options to make this recipe accessible and quick
Nutrition Information:
Yield: 2 Serving Size: 1Amount Per Serving: Calories: 763Total Fat: 35gSaturated Fat: 9gTrans Fat: 0gUnsaturated Fat: 23gCholesterol: 350mgSodium: 1433mgCarbohydrates: 60gFiber: 2gSugar: 13gProtein: 46g
Asianplated.com, occasionally offers nutritional information for recipes contained on this site. This information is provided as a courtesy and is an estimate only. This information comes from online calculators. Although allchickenrecipes.com attempts to provide accurate nutritional information, these figures are only estimates.
Frequently Asked Questions
Can I use store-bought katsu?
Absolutely! I’ve done this on busy weeknights. It makes the dish even faster.
Can I make it ahead?
Yes. Fry the katsu and store it in the fridge or freezer. Then just make the broth and rice when you’re ready to eat.
What rice works best?
Short-grain Japanese rice is ideal because it’s sticky enough to hold the sauce without falling apart. But any rice you have on hand will work in a pinch.
Katsudon is one of those meals that feels special every time I make it, but is easy enough for a weeknight dinner. I hope you’ll try making it at home—it’s the kind of dish that wins over everyone at the table.
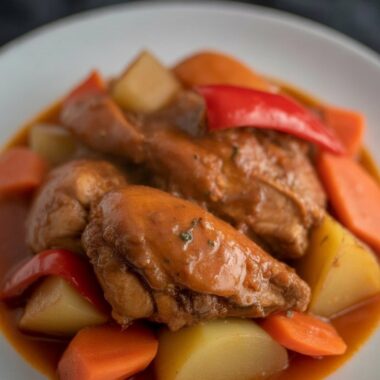
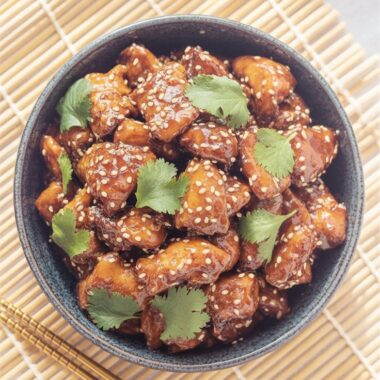
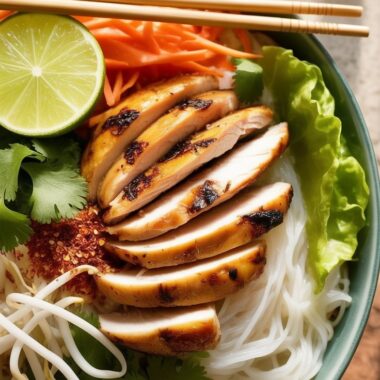
Try other recipes: