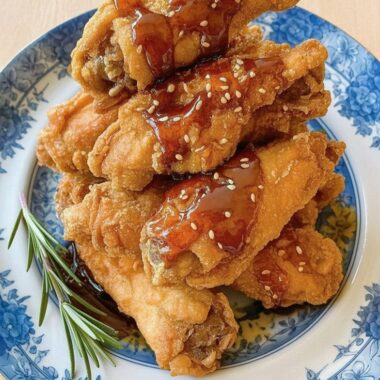
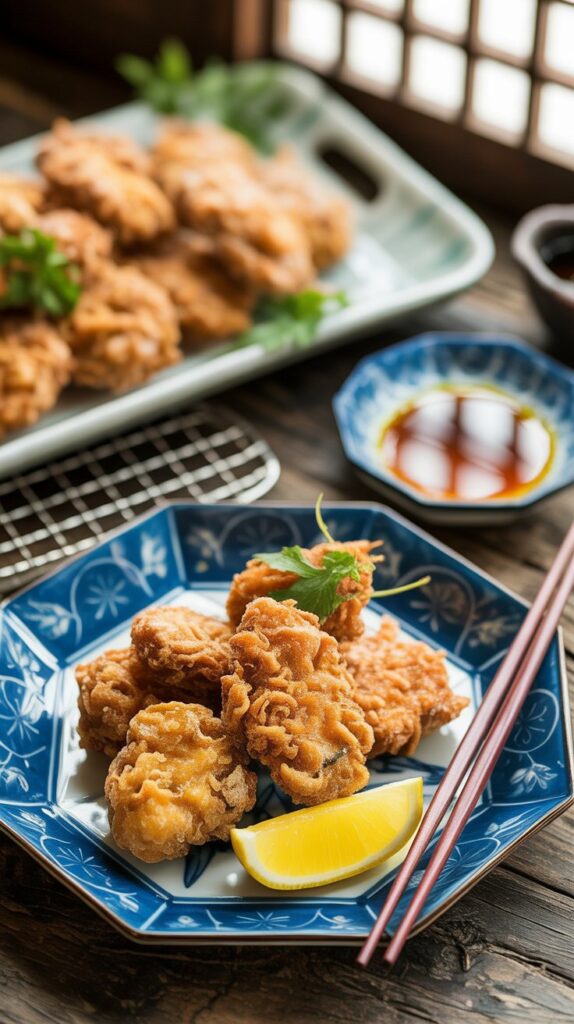
Crispy on the outside, juicy on the inside — this Japanese-style fried chicken has become a regular in my kitchen for weekend dinners, rainy-day cravings, and even those fridge-clearing nights when I just need something comforting.
")
I first tried karaage at a tiny izakaya tucked into a corner alley in Osaka. That first bite — hot, crunchy, packed with garlicky-sweet flavor — made me forget every other fried chicken I’d had before. Years later, I started recreating it at home, experimenting with different marinades and frying techniques until I landed on a version that reminded me of that moment. And now, it’s something I love sharing with friends and family, usually with a few lemon wedges, a dollop of Kewpie mayo, and rice on the side.
What Is Karaage?
Karaage is basically Japan’s take on deep-fried goodness. While technically any protein or vegetable can be karaage-style (coated in starch and fried), most people think of one thing: juicy marinated chicken with a crackly crust. You’ll spot it everywhere in Japan — from school lunch boxes and train station bentos to ramen shops and beer bars.
It’s different from American-style fried chicken — no buttermilk, no flour-heavy batter. The focus here is on tender chicken, flavor-packed marinade, and a thin, crispy coating from potato starch.
Why This Karaage Recipe Works So Well
Crisp perfection without the fuss – I double-fry the chicken, which sounds fancy but is actually super easy. It gives that shatteringly crisp crust that doesn’t turn soggy.
Big flavor with basic pantry stuff – Soy sauce, garlic, ginger… the usual suspects do all the heavy lifting here. No deep marinade needed.
Crowd favorite – Whether it’s a casual dinner, picnic, or birthday spread, karaage always disappears fast. I usually have to make a second batch just in case.
What You’ll Need
Here’s what I keep on the counter when I’m making this:
- Boneless chicken thighs – Skin-on is my go-to. The fat under the skin turns into flavor gold once it hits hot oil.
- Soy sauce – Japanese shoyu works best, but any light soy sauce will do.
- Sake – Adds depth, but if you don’t have it, dry sherry or even water works.
- Toasted sesame oil – A little goes a long way.
- Garlic & ginger – Fresh, always.
- Potato starch – For that signature crunch. Cornstarch works if you’re out.
- All-purpose flour – Helps the coating stick.
- Neutral oil – I use rice bran or canola.
- Lemon wedges, Kewpie mayo, shichimi togarashi – All optional but highly recommended for serving.

Handy Ingredient Swaps
- Chicken thighs – You can use breast, but it won’t be as juicy. If you’re set on white meat, watch the cook time.
- No sake? – Sub with dry sherry or even a splash of apple juice for sweetness.
- Potato starch – Rice flour or cornstarch work too. I’ve tried them all and honestly, all three do the job just fine.
Let’s Make Karaage
Step 1 – Prep the Chicken
Cut the chicken into roughly 2-inch chunks. I try to keep them the same size so they fry evenly — no overcooked edges or raw centers. Season with salt and pepper.
Step 2 – Marinate
Mix up grated ginger, garlic, soy sauce, sake, and sesame oil. Toss the chicken pieces in and let them sit in the fridge for 30 minutes. I find 30–45 minutes is the sweet spot — enough time for flavor without making the chicken mushy.
Step 3 – Heat the Oil
Pour oil into a heavy-bottomed pot and slowly bring it to 325°F (160°C). I usually use a thermometer, but if you don’t have one, test with a wooden chopstick — if bubbles form around it, the oil’s ready.
Step 4 – Dredge
Use two shallow plates: one with flour, one with potato starch. Coat each piece lightly in flour first, then starch. Don’t overdo it — too much coating will soak up oil and go soggy.
Step 5 – First Fry
Fry a few pieces at a time (don’t crowd the pot) for about 90 seconds. Just long enough to start cooking them through and set the crust. Transfer to a wire rack or paper towels.
Step 6 – Second Fry
Now crank the heat to 350°F (180°C) and give each piece a final 45-second fry. This is when the magic happens — the crust puffs and crisps up beautifully.
Step 7 – Serve It Up
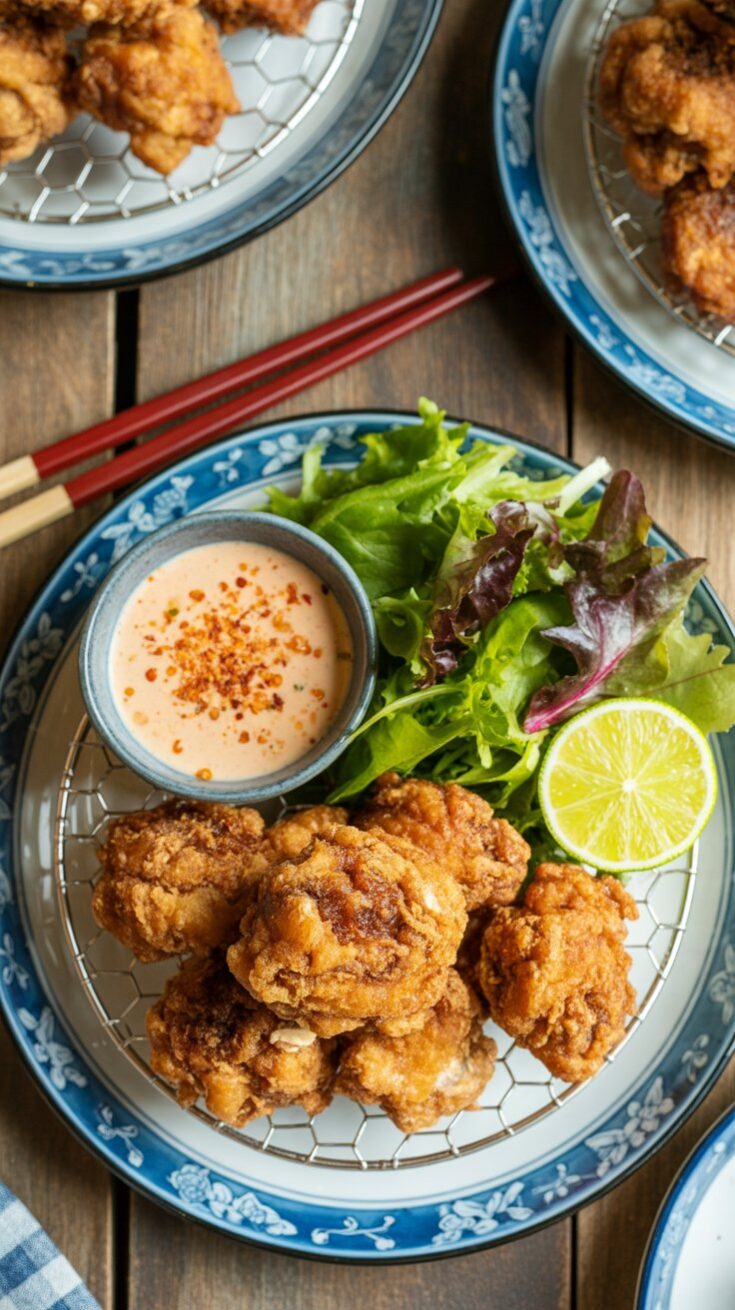
I like to serve karaage hot off the rack with lemon wedges, a swirl of Kewpie mayo, and a pinch of shichimi togarashi for a little heat. It’s fantastic with steamed rice or tucked into sandwiches the next day.
A Few Tips That Always Help Me
- Same-size chunks – They fry more evenly, and no one bites into a half-raw piece.
- Shake off the excess starch – Too much coating = gummy results.
- Work in small batches – I usually fry just 4–5 pieces at a time. If the oil temp drops, you end up with greasy chicken.
- Wire rack over paper towels – The bottom won’t get soggy from steam.
Easy Tweaks You Can Try
- Use chicken breast – Works if you want leaner meat. Just reduce cook time a little.
- Go gluten-free – Swap all-purpose flour with more potato starch or rice flour.
- Make it spicy – Add chili flakes or togarashi to the marinade if you like a kick.
What I Serve With Karaage
- Steamed rice – Always a classic pairing.
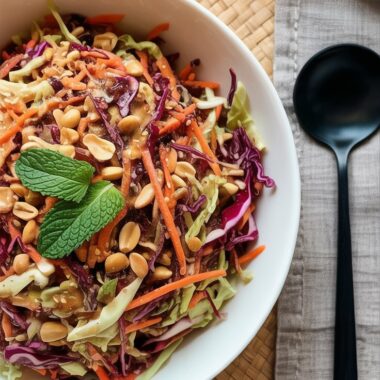
- Cabbage slaw – Something crunchy and light on the side.
- Miso soup – For a cozy, complete meal.
- Gyoza or edamame – If I’m feeding a crowd, I put out a whole spread.
Sometimes I even wrap karaage in lettuce leaves with a little rice and mayo for makeshift lettuce wraps — quick, fun, and surprisingly satisfying.
Storing and Reheating Leftovers
- Fridge – Store in an airtight box for up to 4 days. I like to separate layers with parchment so the coating doesn’t get soggy.
- Freezer – It holds up great for about 3 months. Freeze on a tray first, then transfer to a bag.
- Reheat – Use the oven or air fryer at 350°F. Avoid the microwave unless you like soggy chicken (I don’t).
Common Questions
Can I prep this ahead of time?
Yes! You can marinate the chicken in the morning and keep it chilled until dinner. Just dredge and fry fresh.
Is there a way to bake it instead?
Honestly, the crunch won’t be the same. But if you really want to, you can spray the coated chicken with oil and bake at 425°F until golden.
Can I use an air fryer?
Yes. Air fry at 375°F for about 12–15 minutes, flipping halfway through. It won’t match deep-fried crunch, but still pretty darn good.
If you’ve never made fried chicken at home or felt intimidated by it, I hope this recipe changes your mind. Karaage has become one of those go-to comfort dishes in my house, and once you taste it, I think you’ll see why. Let me know how yours turns out — I’m always curious to hear what tweaks others try.
Ready to give it a shot?
Karaage (Japanese Fried Chicken)
Crispy on the outside and melt-in-your-mouth juicy within, karaage is pure comfort food with a Japanese soul.
Ingredients
- 1½lb boneless, skin-on chicken thighs (cut into 2-inch pieces)
- ½–1Tbsp soy sauce
- ½Tbsp sake (or dry sherry, or skip if desired)
- ½tsp toasted sesame oil
- ½tsp ginger, freshly grated (with juice)
- 1 clove garlic, minced or pressed
- ½tsp kosher salt
- ⅛tsp freshly ground black pepper
- 2Tbsp all-purpose flour (plus more as needed)
- 2Tbsp potato starch or cornstarch (plus more as needed)
- 3–4 cups neutral oil for deep-frying
For Serving (optional):
- Lemon wedges
- Japanese Kewpie mayonnaise
- Shichimi togarashi (Japanese seven spice)
Instructions
- Marinate the Chicken:- In a large bowl, combine ginger, garlic, soy sauce, sake, and sesame oil. Add the chicken pieces, salt, and pepper. Massage the marinade into the chicken until well coated. Cover and refrigerate for 30 minutes.
- Prep for Frying:- While the chicken marinates, pour enough neutral oil into a heavy-bottomed pot to reach at least 1 to 1.5 inches deep. Heat the oil slowly to 325ºF (160ºC).
- Coat the Chicken:- On a tray, create separate piles of all-purpose flour and potato starch (or cornstarch). Dredge each piece of marinated chicken lightly in flour, dusting off excess, then coat generously in the potato starch. Set aside on a tray.
- Fry the Chicken – First Fry:- When the oil is at temperature, gently lower in 3–5 pieces at a time, taking care not to crowd the pot. Fry for 90 seconds or until light golden and just set. Remove to a wire rack. Allow all pieces to fry once. Skim crumbs from the oil between batches to keep it clean.
- Second Fry for Crispiness:- Raise the oil to 350ºF (180ºC). Fry the chicken pieces a second time—45 seconds or until deep golden and extra crisp. Drain again on the rack.
- Serve:- Enjoy karaage hot, with lemon wedges for squeezing, a side of Kewpie mayo, and a dusting of shichimi togarashi for heat if you wish.
- Storage:- Leftover karaage can be kept in an airtight container—refrigerate up to 3 days or freeze up to 1 month.
Notes
- For the crispiest crust, don’t skip the double-fry—it’s the secret to karaage’s famous crunch.
- Always marinate long enough for the flavors to deepen, but don’t over-marinate or the chicken can become too salty.
- Use a thermometer to keep oil temperature steady for even frying.
Nutrition Information:
Yield: 4 Serving Size: 1Amount Per Serving: Calories: 17037Total Fat: 1915gSaturated Fat: 127gTrans Fat: 15gUnsaturated Fat: 1704gCholesterol: 74mgSodium: 502mgCarbohydrates: 12gFiber: 1gSugar: 1gProtein: 15g
Asianplated.com, occasionally offers nutritional information for recipes contained on this site. This information is provided as a courtesy and is an estimate only. This information comes from online calculators. Although allchickenrecipes.com attempts to provide accurate nutritional information, these figures are only estimates.
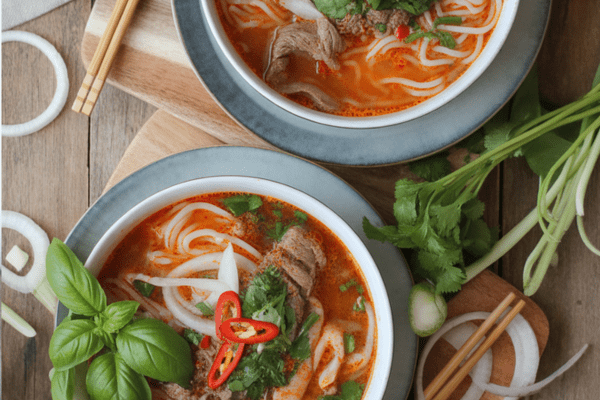
Try other Japanese recipes: