If you’ve ever reached for one of those store-bought bottles of teriyaki sauce, you’ll know they’re convenient—but let’s be honest, they don’t hold a candle to homemade. Once you try making it yourself, you’ll see just how easy (and fast) it is to whip up something that tastes far richer and more balanced.

I’ve been making this sauce for years, and it’s one of my favorite ways to add big flavor to a weeknight dinner with almost no effort. It takes less than five minutes to prepare, but tastes like something you simmered for hours.
What is Teriyaki?
Teriyaki isn’t just a sauce—it’s actually the name of a cooking technique where you grill or broil food while repeatedly brushing it with a glossy glaze. “Yaki” means to grill or broil, and “teri” refers to the shine you get from the caramelized sugars in the sauce.
It’s that gorgeous sheen you see on perfectly cooked chicken skewers or salmon fillets in Japanese restaurants. The best part is you can recreate that same effect at home with just a few ingredients from the pantry.
Why Make Your Own?
I started making my own teriyaki sauce ages ago after one too many disappointing bottled versions. Homemade sauce lets you really control what goes in: you can adjust the saltiness, the sweetness, even the ginger level to your own taste.
I like mine with a bit more ginger bite and just enough sweetness to balance the savory notes. If you’ve got family members with different tastes, it’s easy to split the batch and tweak one half sweeter or milder.
Another big plus is knowing exactly what you’re eating—no weird additives or mystery syrups, just honest ingredients.
Importance of Soy Sauce and Mirin
Let’s talk about the backbone of teriyaki: soy sauce and mirin.
Soy sauce (shoyu in Japanese) is so much more than salt water with color. Good soy sauce is fermented for months—even years—breaking down soybeans, wheat, and salt into this incredible umami-rich liquid. When I first learned about the traditional fermentation process, it made me appreciate it so much more. I always keep a bottle of naturally brewed, dark soy sauce in the pantry for recipes like this.
Then there’s mirin—a sweet fermented rice wine that adds that characteristic gentle sweetness and gloss to the sauce. It’s one of those ingredients that seems minor but really rounds out the flavor. If you can’t find authentic mirin, I sometimes substitute with a semisweet white wine and a pinch more sugar. It’s not exactly the same, but it works in a pinch and still tastes great.

Ingredients
Here’s what you’ll need to make this sauce. Don’t be intimidated—it’s all stuff you can find at a decent grocery store or online.
- Soy sauce: I recommend using naturally brewed dark soy sauce for depth and richness. I’ve tried cheaper brands before, but the good stuff really does make a difference here.
- Sugar: Brown sugar is my favorite—it gives the sauce a deeper, molasses-like flavor. If you want, you can use white sugar or swap in honey for a different vibe. I sometimes do a honey version when I want a floral, lighter glaze for grilled chicken.
- Mirin: Authentic mirin is best, but don’t let the lack of it stop you. If you can’t find it, try using a semisweet white wine with a little extra sugar.
- Ginger: Fresh ginger is fantastic if you have it. I’ve used both fresh and powdered. When using fresh, mince it super fine to avoid fibrous bits in the sauce. I’ve even blended the sauce once or twice to get it extra smooth.
- Thickener: I use cornstarch most of the time because it’s what I have in the cupboard. Potato starch or tapioca starch work just as well.
- Optional MSG: Sometimes I add a pinch for that extra umami boost. Especially if I’m using a lighter soy sauce or want it to really pop on grilled meat.
Instructions
Making this sauce is about as easy as it gets, which is part of why I love it so much.
- Measure everything out. Get all your ingredients ready—makes you feel like a pro and prevents frantic scrambling.
- Combine ingredients (except for the cornstarch and water) in a small saucepan. If you’re using xanthan gum instead of cornstarch, you can blend that in right away.
- Make a slurry with cornstarch and water. This step is key for avoiding lumps. I mix it in a little cup with a fork before adding.
- Simmer and whisk. Bring the sauce mixture to a gentle simmer over medium heat, whisking occasionally.
- Thicken. Slowly add the slurry while whisking. You’ll see the sauce thicken up into that luscious, shiny consistency in no time.
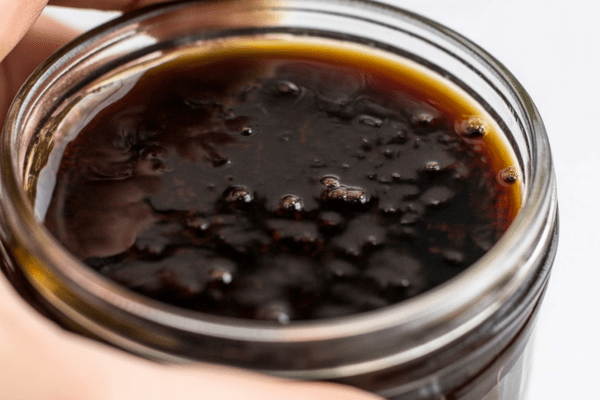
Once it’s done, I let it cool a bit before pouring it into a jar. It keeps well in the fridge for a couple of weeks, though mine rarely lasts that long.
Tip: If you’re using fresh ginger, chop it as fine as you can. Little chunks can burn when grilling, so smoother is better. A quick whiz in the blender solves that if you want it extra silky.
Serving Suggestions
This sauce is incredibly versatile. I use it on just about everything when I’m in the mood for Japanese flavors.
- Stir-Fries: A splash of teriyaki at the end of cooking brightens everything up. Just thin it with a bit of water if it’s too thick.
- Meat: Brushed onto bacon-wrapped pork tenderloin or roasted chicken. It makes even cheap cuts of steak sing. I love marinating chicken thighs in it before throwing them on the grill.
- Vegetables: Drizzle over roasted broccoli or bok choy for a quick side dish. Or swap it in for miso glaze on eggplant for something different.
- Fish: Glaze salmon fillets or tuna steaks before finishing them in the oven. It gives you that restaurant-style caramelized top.
- Raw Food: I’ve served it as a dipping sauce for sashimi, seared beef, or even raw vegetable sticks. It’s like an upgraded soy sauce for snacking.
Pro Tip
If you want a really professional finish, try adding just a tiny pinch of xanthan gum. It’s a natural thickener and helps the sauce cling to food better—especially handy for skewers or anything that releases a lot of juice while cooking.
I don’t always do this, but it’s my little trick when I’m serving guests and want everything to look extra polished.
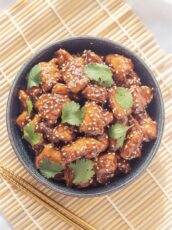
Japanese Teriyaki Sauce
There’s something truly special about the depth of flavor in a good teriyaki sauce—sweet, savory, with a warm whisper of ginger that clings beautifully to anything it touches.
Ingredients
- ½ cup (120 g) naturally brewed soy sauce
- ⅖ cup (90 g) brown sugar
- 1 teaspoon ground ginger (or 6 g finely chopped fresh ginger)
- 3/7 cup (100 g) water
- 2 ⅔ tablespoons (40 g) mirin or semi-sweet white wine
- 6 teaspoons (18 g) cornstarch or ½ g xanthan gum
Instructions
- Prep like a pro: Start by measuring out all your ingredients. If you're using cornstarch to thicken the sauce, mix it with the water in a small bowl to create a smooth slurry. If you’re opting for xanthan gum, skip the slurry and keep your blender ready.
- Simmer the base: In a saucepan over medium heat, combine the soy sauce, brown sugar, mirin (or wine), and ginger—everything except the slurry. Stir gently as the mixture warms and the sugar begins to dissolve.
- Thicken it up: Slowly whisk in your cornstarch slurry and keep the sauce moving until it thickens to that signature glossy finish. If you're using xanthan gum, blend until smooth and thickened.
- Cool and store: Once your sauce is luscious and smooth, let it cool and transfer to a clean, airtight container. It’ll keep in the fridge for weeks—perfect for impromptu teriyaki nights.
Notes
- If you’re using fresh ginger, make sure to mince it as finely as possible. Any larger bits can burn if you’re brushing the sauce on food over high heat—especially on the grill.
- This sauce doesn’t include garlic—true to traditional Japanese teriyaki, which lets the ginger and soy flavors shine.
- Don’t be afraid to let it thicken well. A rich, syrupy texture is what makes it cling so beautifully to chicken thighs, pork belly, beef skewers, or even tofu and shrimp.
- I often use it as a glaze during the last few minutes of grilling, or toss it into a hot wok with vegetables and noodles.
Nutrition Information:
Yield: 8 Serving Size: 1Amount Per Serving: Calories: 19Total Fat: 0gSaturated Fat: 0gTrans Fat: 0gUnsaturated Fat: 0gCholesterol: 0mgSodium: 111mgCarbohydrates: 1gFiber: 0gSugar: 0gProtein: 0g
Asianplated.com, occasionally offers nutritional information for recipes contained on this site. This information is provided as a courtesy and is an estimate only. This information comes from online calculators. Although allchickenrecipes.com attempts to provide accurate nutritional information, these figures are only estimates.
Frequently Asked Questions
Can I use it as a marinade?
Yes! It’s excellent for marinating meats, chicken, or even firm tofu. Just remember it’s quite concentrated, so I sometimes thin it with a splash of water or sake when marinating.
How do I store it?
I pour it into a clean glass jar or bottle and keep it in the fridge. It stays good for at least two weeks. Just give it a little shake if it settles.
I hope this recipe inspires you to skip the bottle and try making your own teriyaki sauce at home. It’s one of those little upgrades that makes weeknight cooking feel special. Once you taste it, you’ll wonder why you didn’t start sooner.
Try other recipes: