These homemade Japanese dumplings have become a real comfort food in my kitchen. Crisp, golden bottoms with juicy, savory filling inside—what’s not to love? Making them from scratch might sound like a bit of work, but I promise it’s the good kind of work—the kind you can share with family or friends, chatting as you fold each dumpling.
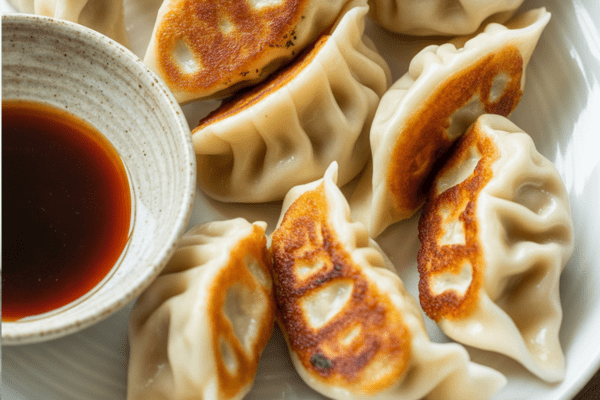
I still remember the first time I tried making gyoza at home. It was a rainy evening, and I was looking for something cozy to cook. By the time they were sizzling in the pan, my entire house smelled incredible. And that first bite? Heaven. Now it’s a regular request from my family.
What Exactly Are Gyoza?
Gyoza are the Japanese version of Chinese dumplings. They were introduced after World War II, when people returning from China brought back a love for those flavors. Over time, Japan made them their own: smaller, thinner wrappers, and a finely seasoned filling that’s both juicy and light.
You’ll find them everywhere in Japan—from street stalls to ramen shops. And while you can buy them frozen or get them at restaurants, homemade gyoza have a charm that’s hard to beat.
I love making them on weekends. The process is surprisingly relaxing, and there’s something about folding dumplings by hand that feels special, like you’re putting extra care into each one.
Ingredients You’ll Need
Here’s what you’ll want to gather before you get started:
- Gyoza wrappers – I usually buy mine at the local Asian grocery. They’re thinner than Chinese potsticker wrappers, which helps them get that crisp finish. If you’re feeling ambitious, you can even make them from scratch.
- Ground pork – The classic choice. But you can swap in chicken, turkey, or even tofu and mushrooms for a meat-free version.
- Green cabbage – I like the fresh crunch it adds. Make sure to salt and wilt it so it blends well in the filling.
- Green onions – For that mild, sweet onion bite.
- Fresh shiitake mushrooms – These are my secret weapon. They add a deep, savory flavor.
- Garlic and ginger – Can’t skip these! They’re what give gyoza that unmistakable aroma.
- Sake – Optional, but it helps balance flavors.
- Soy sauce, toasted sesame oil, black pepper – For seasoning.
- Neutral oil and water – For cooking.
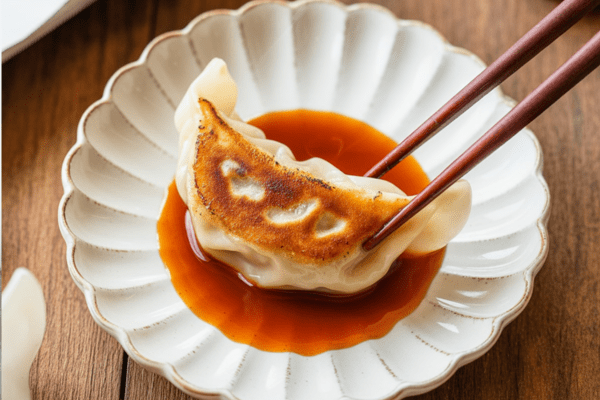
- Dipping sauce ingredients – Rice vinegar, soy sauce, and Japanese chili oil.
Easy Ingredient Swaps
I’m a big believer in cooking with what you have. Here are a few ways I switch things up:
- Cabbage – If green cabbage isn’t on hand, napa cabbage works well too. It’s softer and has a slightly sweeter taste.
- Protein – Ground pork is traditional, but ground chicken, turkey, or even lamb can make great variations. For a plant-based filling, try firm tofu mixed with mushrooms and veggies.
- Sake – If you don’t use alcohol, just leave it out. Garlic and ginger do a lot of the heavy lifting for flavor anyway.
How I Make Gyoza at Home
I won’t lie—making gyoza does take a little time. But it’s the kind of cooking that feels rewarding and even meditative once you get into the groove. Here’s how I do it in my kitchen.
Prepping the Filling
First, I chop the cabbage finely and sprinkle it with salt to draw out moisture. This step is important because too much water can make the wrappers soggy. I set it aside for a few minutes, then squeeze it out like wringing a wet cloth—don’t be shy!
Meanwhile, I mince the green onions, shiitake mushrooms, garlic, and ginger. All of these go into a large bowl with the ground pork and seasonings. I like to roll up my sleeves and mix by hand. It’s messier but really helps the filling come together. I knead it until it feels sticky and pale in color, which means it’ll hold together beautifully when cooked.
Folding the Dumplings
This is the fun part. I hold a wrapper in one hand, spoon in a small amount of filling (less than a tablespoon), and wet the edges with water.
Then I fold it in half and start making pleats toward the center. Don’t worry if they’re not perfect! The first few might look wonky, but you’ll find your rhythm quickly. I usually set up a little folding station at my dining table with my family—makes for great conversation time.

Cooking Them to Crispy Perfection
I heat up a nonstick or carbon-steel pan over medium heat with a little oil. Then I arrange the gyoza in a circle, leaving space so they don’t stick.
I let them fry for about 3 minutes until the bottoms turn golden brown. Then I add water and cover to steam them through. Once the water is nearly gone, I take off the lid and drizzle a bit of toasted sesame oil around the pan to help them crisp back up.
The smell at this point is irresistible. I usually find myself “taste-testing” one before I even plate them.
Personal Tips I’ve Learned Over Time
- Balance of filling – I like a near-equal mix of meat and cabbage for that juicy but light texture. You can adjust to your taste.
- Salt the cabbage properly – This really matters. It keeps your filling from getting wet and soggy.
- Mix by hand – It helps the meat develop a smoother texture and the flavors meld better.
- Don’t overfill – It’s tempting to stuff them full, but less is more. A little filling goes a long way.
- Cover the wrappers – Keep them under a damp cloth while you work so they don’t dry out and crack.
- Cook or freeze right away – If you let the filled dumplings sit too long, they’ll get soggy. I either cook them immediately or freeze them on a tray before bagging them up.
Playing Around with Fillings and Flavors
One of my favorite things about gyoza is how flexible they are.
- Add garlic chives – My mom loves adding them. I used to skip them when my son was little, but now I add them back in.
- Try different proteins – Don’t be afraid to swap pork for chicken, turkey, or even lamb.
- Make them vegetarian – Tofu, mushrooms, and finely chopped veggies make a filling that’s satisfying but lighter.
- Experiment with sauces – I sometimes mix up a miso dipping sauce with miso paste, soy sauce, rice vinegar, sugar, and chili oil. Or ponzu with a bit of yuzu kosho for a citrusy kick.
What to Serve With These Dumplings
Gyoza are incredibly versatile. In my house, we serve them:
- As an appetizer before ramen—classic combo.
- With steamed rice and miso soup for a full meal.
- Alongside karaage (Japanese fried chicken) for a homemade izakaya spread.
- Packed into bento boxes the next day. Leftover gyoza in a lunchbox always feels like such a treat.
Keeping Extras for Later
I always make a big batch so I can freeze some for those nights I don’t feel like cooking.
- Uncooked dumplings – I lay them out on a baking sheet to freeze individually. Once frozen, I pop them into a freezer bag. They’ll keep for about a month. When I want to cook them, I just throw them straight into the pan—no thawing needed. I just add an extra minute or two of steaming time.
- Cooked leftovers – I store them in an airtight container in the fridge for up to three days. They reheat well in a pan.
- Extra wrappers – I hate wasting them. I’ll often make quick cheese wraps by folding sliced cheese inside, sealing, and frying them up until crisp and gooey.
Japanese Gyoza Dumplings

There’s something comforting about the sizzle of dumplings hitting a hot pan. These Japanese-style gyoza are golden and crispy underneath, juicy and flavorful inside, and always a crowd-pleaser.
Ingredients
For the Filling:
- ½ lb ground pork
- ¾ lb green cabbage (about ¼ of a large head), finely chopped
- 2 green onions, finely sliced
- 2 shiitake mushrooms, finely diced
- 2 garlic cloves, minced or pressed
- 1 tsp fresh grated ginger (with juice)
- 1 tsp kosher salt (to wilt cabbage)
Seasonings:
- 2 tsp soy sauce
- 2 tsp sake (optional, for mellowing pork flavor)
- 2 tsp toasted sesame oil
- ⅛ tsp freshly ground black pepper
To Wrap:
- 1 pack gyoza wrappers (about 52 wrappers, 10 oz/284 g)
- Water (for sealing)
To Cook Each Batch:
- 1 Tbsp neutral cooking oil (like canola or vegetable)
- 4 Tbsp water
- 1 tsp toasted sesame oil
Dipping Sauce (Per Serving):
- 1 Tbsp soy sauce
- 1 Tbsp rice vinegar (unseasoned)
- A dash (⅛ tsp) Japanese chili oil (la-yu), optional
Instructions
- Prepare the Filling: Start by chopping the cabbage finely. Discard the thick core and slice the leaves into thin strips, then run your knife through them again until finely minced.
- Sprinkle the chopped cabbage with salt and gently massage it with your hands. Set aside in a bowl to allow it to soften and release moisture.
- In a separate mixing bowl, combine the ground pork with green onions, mushrooms, garlic, and ginger.
- Add the seasonings—soy sauce, sake (if using), sesame oil, and black pepper—to the pork mixture.
- Squeeze out excess liquid from the salted cabbage and stir it into the pork mixture. Mix everything thoroughly with your hand until the filling becomes slightly sticky and cohesive.
- Assemble the Gyoza: Keep your gyoza wrappers covered with a damp cloth or plastic wrap to prevent them from drying out.
- Prepare a small bowl of water and a tray lined with parchment paper or lightly dusted with starch.
- Place one wrapper in your palm and spoon about ¾ to 1 tablespoon of filling into the center. Flatten it slightly and remove any air pockets.
- Moisten the outer edge of the wrapper with water. Fold it in half and pinch the center together lightly.
- Create small pleats from each side toward the center—three to four pleats per side—pressing tightly to seal.
- Once folded, gently shape the dumpling so it sits flat on one side. Set aside on the tray and cover while you repeat with the rest.
- To Freeze (Optional): Line the dumplings in a single layer on a tray (not touching), cover, and freeze until firm. Transfer to a sealed freezer bag and keep frozen for up to 1 month. No need to thaw before cooking.
- To Cook: Brush off excess starch from the base of each gyoza.
- Heat a large nonstick or carbon steel pan over medium heat. Once hot, add the neutral oil.
- Arrange the dumplings flat-side down in a single layer without crowding the pan.
- Cook until the bottoms turn golden brown, about 2–3 minutes.
- Pour in water and immediately cover the pan with a lid to steam the gyoza for another 3–4 minutes. If cooking from frozen, steam for an extra 1–2 minutes.
- Remove the lid and allow any remaining water to evaporate. Drizzle sesame oil around the pan and cook uncovered until the bottoms crisp up again.
Notes
- Cooked leftovers can be refrigerated for up to 3 days or frozen.
- Leftover filling can be turned into tiny meatballs or pan-fried patties.
- Extra wrappers? Fill them with cheese, fold, and pan-fry until crisp for a fun snack.
Nutrition Information:
Yield: 52 Serving Size: 1Amount Per Serving: Calories: 23Total Fat: 2gSaturated Fat: 0gTrans Fat: 0gUnsaturated Fat: 1gCholesterol: 4mgSodium: 57mgCarbohydrates: 1gFiber: 0gSugar: 0gProtein: 1g
Asianplated.com, occasionally offers nutritional information for recipes contained on this site. This information is provided as a courtesy and is an estimate only. This information comes from online calculators. Although allchickenrecipes.com attempts to provide accurate nutritional information, these figures are only estimates.
Common Questions I Get About Making Gyoza
Do I really need to salt the cabbage?
Yes—this is what keeps the filling from being too wet. Don’t skip it.
Can I freeze them?
Absolutely. I almost always do. Just make sure to freeze them on a tray first so they don’t stick together.
What if I can’t pleat them perfectly?
Don’t sweat it. As long as they’re sealed, they’ll cook up just fine. Your folds will get neater with practice.
If you’ve never tried making gyoza at home before, I hope this convinces you to give it a shot. It’s not just about the final dish—it’s about slowing down, getting your hands a little messy, and sharing the experience with people you care about.
Try other Japanese recipes:

