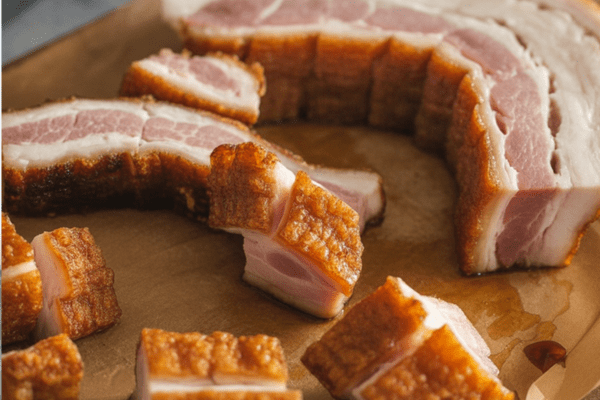
I’ll be honest: making Lechon Kawali at home feels a bit like committing to an afternoon project, but one I’ll never complain about. There’s nothing quite like that golden, shatteringly crisp pork belly skin you get when you do it right.

You know, there are days when I’ll choose the oven-roasted style (so much less mess), but on a hot day in my small kitchen? Forget it—I don’t want that oven heat all day. And truth be told, I still have a soft spot for the classic fried version I’ve been making for years, especially because it gets my family hovering around the kitchen asking when it’s ready.
So let’s break it down in simple, honest terms—the way I do it at home, with all the little details that make it work.
What You’ll Need and Why I Use Them
Pork Belly
Get a slab with a good cap of skin on top. It can be boneless or bone-in (ask the butcher to partially cut the ribs if you like easier chopping). That thick skin is what turns into the glorious crackling we’re after.
Aromatics
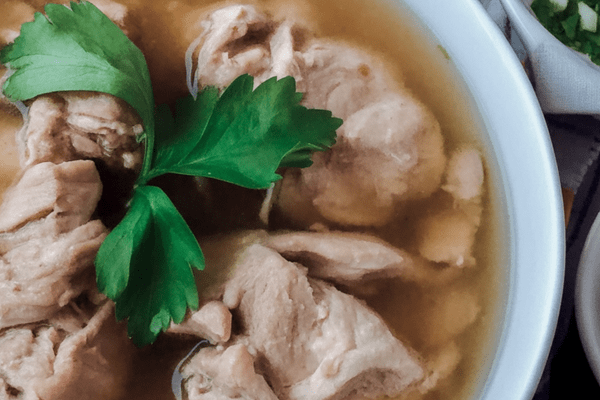
I always throw in crushed garlic, bay leaves, peppercorns, and salt in the boiling water. It makes the meat flavorful all the way through, so the inside isn’t bland.
Vinegar
Brushing vinegar over the skin helps dry it out, which is key for that crunchy finish.
Salt
Besides seasoning, salt draws out moisture from the skin. Don’t be shy with it.
Oil
Use something with a high smoke point. I usually grab canola or peanut oil, whatever I have that can handle the heat without burning.
How I Cook It Step by Step
- Boiling First
I simmer the pork until it’s tender but not falling apart. This is important—you want it moist and juicy, not dry. I’m always patient here because the simmer sets the foundation. - Cooling and Drying
After boiling, I let it cool completely and then pat it dry with paper towels. Don’t skip this—any leftover moisture is your enemy in the fryer. - Scoring and Brushing
I lightly score the skin with a fork or knife, being careful not to cut into the meat itself. Then I brush the skin with vinegar. This is one of those little steps that really matters. - Salting
I rub salt all over and even press a thin layer on top of the skin to help draw out more moisture. Think of it as prepping it for that perfect crackle. - Chilling Overnight
I leave it in the fridge uncovered on a rack, skin side up. It sounds fussy, but letting the skin dry completely is the magic behind that blistered finish. Sometimes I’ll do this step a day ahead so it’s easier when I want to fry. - Frying Day
I use enough oil to submerge the slab if possible and keep the temperature around 350 to 375 F. That range gives me crispy skin without burning.
If I’m feeling rushed, I’ll cut the slab into smaller pieces for quicker frying, but honestly, frying it whole keeps it juicier.
- Resting Before Cutting
I let it rest for a few minutes so the juices settle back in. Cut too soon, and you’ll lose those juices on the board.
My Home Cook Tips for Extra Flavor
- If you get bone-in pork, ask your butcher to score between the bones. Makes it much easier to chop later.
- For a fun twist, I sometimes replace part of the boiling water with Sprite. It adds a subtle sweetness that people can’t quite place but always love.
- Don’t rush drying the meat after boiling. Moisture is what makes oil spit and splatter like crazy.

Staying Safe While Frying
This isn’t the dish to cook in a tiny pot. I always choose one big enough to comfortably hold the oil plus the pork without risk of overflow.
I keep a splatter screen handy too. Even with careful drying, you’ll get some popping.
Some cooks like to sprinkle water into the hot oil to force crackling. I tried it early on but gave it up fast—it’s a recipe for burned arms. Honestly, thorough drying and overnight chilling get you the same result without the drama.
How I Like to Serve It
Lechon Kawali is the star of the table whether you’re serving it as an appetizer with drinks or as the main course with rice.
For dipping, I set out:
- Filipino-style liver sauce (Lechon Sarsa)
- Spiced vinegar (my usual mix is cane vinegar with soy sauce, shallot, garlic, chili, and cracked pepper)
- Banana ketchup for the kids
- Sweet and sour sauce if I’m feeling fancy
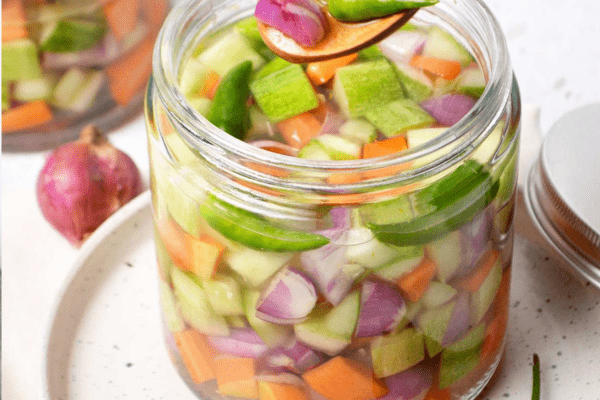
- Atchara (pickled papaya) for a bright, tangy bite
I love laying it all out so everyone can mix and match sauces. It makes the meal feel like a little feast.
Keeping Leftovers Tasty
Look, fried pork belly is at its best fresh. That crisp skin doesn’t stay crunchy forever.
If I know we’ll finish it all, I fry just enough for the meal.
If I have extra boiled (but unfried) pork, I store it in an airtight container in the fridge for up to three days. I can even freeze it for up to three months. Then, when I want fresh Lechon Kawali again, I thaw and fry—just as good as the first time.
Filipino Lechon Kawali
There’s nothing quite like the crackle of perfectly crispy pork skin giving way to tender, juicy layers of pork belly underneath.
Ingredients
- 4 pounds whole pork belly
- 1 tablespoon whole peppercorns
- 1 head of garlic, lightly crushed
- 2 bay leaves
- 2 tablespoons salt (plus extra for drying)
- Canola oil, for deep frying
- Water, as needed
- Vinegar, for brushing
Instructions
- Simmer for Tenderness: In a large stockpot, add the pork belly, peppercorns, crushed garlic, bay leaves, and salt. Pour in enough water to fully submerge the meat. Bring to a boil over medium heat, skimming off any foam that rises to the top. Once boiling, reduce the heat, cover, and let it simmer gently for about 1 to 1 ½ hours until the pork is tender but still holds its shape.
- Dry and Prepare the Skin: Remove the pork from the pot and discard the cooking liquid. Let it cool until manageable, then pat it dry thoroughly with paper towels. Use a fork to lightly score the skin. Brush the surface with vinegar and rub salt generously over the pork, especially on the skin.
- Chill and Dry: Place the pork belly on a wire rack set over a tray. Refrigerate uncovered overnight to ensure the skin dries out completely. This step is key to achieving that irresistible crispness. Before frying, scrape off any excess salt.
- Deep-Fry to Perfection: Heat a deep, heavy-bottomed pan with enough canola oil to fully submerge the meat. Once the oil reaches 350°F to 375°F, carefully lower the pork belly in. Fry until the skin blisters and turns a deep golden brown, flipping as needed for even cooking.
- Rest and Serve: Remove the pork and drain on a wire rack to maintain crispness. Let it rest for a few minutes before slicing into bite-sized pieces. Serve hot with your favorite dipping sauce — vinegar with crushed garlic, or liver sauce for something richer.
Notes
- Kitchen Tip: Ask your butcher to score the ribs if you’d like easier slicing later. Always keep an eye on your oil temperature to avoid burning the skin or undercooking the meat.
Nutrition Information:
Yield: 8 Serving Size: 1Amount Per Serving: Calories: 686Total Fat: 51gSaturated Fat: 18gTrans Fat: 0gUnsaturated Fat: 31gCholesterol: 191mgSodium: 1801mgCarbohydrates: 2gFiber: 0gSugar: 0gProtein: 53g
Asianplated.com, occasionally offers nutritional information for recipes contained on this site. This information is provided as a courtesy and is an estimate only. This information comes from online calculators. Although allchickenrecipes.com attempts to provide accurate nutritional information, these figures are only estimates.
Final Thoughts
Making Lechon Kawali takes time and care, but for me, it’s always worth it. Nothing beats seeing my family’s eyes light up when they hear that first crunch of the skin. It’s these little rituals, the messy kitchen and all, that make cooking at home feel special.
Try other Filipino recipes: