Soft, chewy, and just the right amount of sweet — this homemade mochi is the easiest kind you can make. Chi chi dango is a beginner-friendly treat that comes together with just a few simple ingredients and no fancy equipment. Naturally gluten-free and dairy-free, it’s one of those nostalgic desserts that’s fun to make and even more fun to eat.

What is Mochi?
Let’s clear the air a bit — mochi can mean a few different things depending on where you are.
Traditionally in Japan, mochi refers to pounded sticky rice cakes made from a special short-grain rice called mochigome. These rice cakes are dense, unsweetened, and often eaten plain, grilled, or in savory dishes.
But if you grew up around Japanese-American homes or in places like Hawaii or California, “mochi” usually refers to sweet rice desserts made using mochiko — a flour ground from that same sticky rice. That’s the version most of us know: chewy, sweet, and perfect for snacking or sharing.
Basically, there are two main ways to make mochi:
- Pound cooked glutinous rice until smooth and sticky
- Mix mochiko flour with liquid ingredients and cook it into a chewy dessert
This recipe follows the second path — using mochiko to make a soft, sweet mochi that’s easy to slice and serve.
What is Chi Chi Dango?
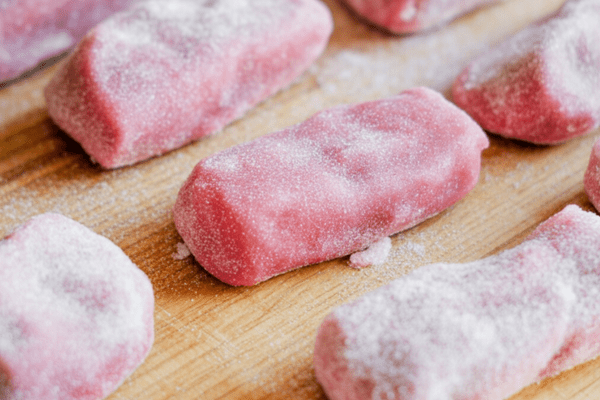
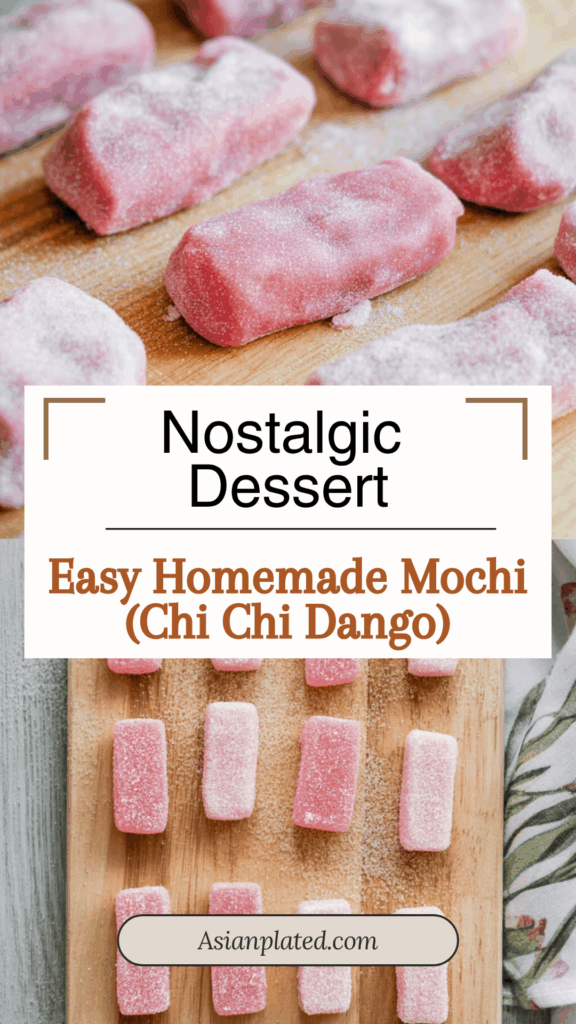
In my family, if someone says they’re craving “mochi,” they usually mean chi chi dango. It’s a soft, sweet rice dessert — think of it like a little mochi caramel. These rectangular, candy-sized pieces are popular in Hawaii and are especially loved during Hinamatsuri (Girl’s Day), often tinted pink and white.
Chi chi dango actually comes from Hiroshima, Japan, but it really found its fame in Hawaii, brought over by Japanese plantation workers. Funny enough, many visitors from Japan now associate chi chi dango as a Hawaiian dessert, not realizing it traveled the other way!
If you’ve ever topped frozen yogurt with those little chewy mochi cubes, you’ll love this. It’s essentially that, but fresher, softer, and more flavorful.
Chi Chi Dango vs. Traditional Mochi
Here’s the deal — traditional mochi in Japan is made by pounding cooked glutinous rice. That’s just rice, nothing else.
Chi chi dango, on the other hand, is a dessert made with mochiko (sweet rice flour) and includes sugar, liquid, and sometimes flavorings or colorings. In the Japanese American community, we often use the term “mochi” for both, but technically they’re made quite differently.
Ingredients for Homemade Mochi
The beauty of chi chi dango is in its simplicity. You only need:
- Mochiko (glutinous rice flour) – This is the base. I usually go for the Blue Star brand by Koda Farms.
- Coconut milk – Adds a subtle richness and creaminess.
- Water – Helps thin the batter to the right consistency.
- Sugar – Sweetens the mochi just enough.
- Potato starch (katakuriko) – For dusting and keeping the pieces from sticking together. You can substitute with cornstarch if needed, but I personally prefer the softer finish of potato starch.
Food coloring is totally optional. I like to add a little pink for festive occasions or when I’m feeling nostalgic for those pastel treats at family parties.
Tip: Stick to mochiko flour for best results. Even flours made from similar rice types (like shiratamako or Thai sweet rice flour) can give you different textures.
How to Make Mochi in the Microwave
When I was younger, we used to make mochi right in the microwave. All you needed was a plastic microwave-safe bundt pan — not exactly something you’d find in most kitchens, but it worked great.
To make it this way:
- Mix the batter as usual.
- Pour it into the microwave-safe dish and cover it tightly with plastic wrap.
- Microwave on high for 8–9 minutes, or until the mochi is set.
Just be careful when removing the wrap — the steam is no joke.
You can also scale the recipe down to a smaller portion and cook it in a regular microwave-safe bowl. It’s great for testing or small batches.
These days, though, I mostly bake mine. It’s easier, more consistent, and I don’t have to worry about microwaving plastic.
How to Make Mochi in the Oven
Baking is my go-to method now, and it’s super straightforward:
- Use a glass baking dish (like Pyrex) – It helps avoid sticking.
- Cover tightly with foil – This traps steam and keeps the mochi soft.
- Bake at 350°F (180°C) for about an hour, then let it cool completely before slicing.
Once it cools, it’ll be easy to cut into pieces. And here’s a little trick: use a pizza cutter! It glides through without sticking. No pizza cutter? A plastic knife works great too.
How to Store Mochi
Chi chi dango keeps well at room temperature. Just store it in an airtight container and it’ll stay soft for 2–3 days. If it’s super hot and humid where you live, the fridge can help — just make sure to let it come back to room temp before serving so it’s not too firm.
And while I’ve heard that mochi can be frozen and reheated, I’ve honestly never had leftovers last that long. It always disappears in a day or two!
Fun Ways to Shape Mochi
If you want to make your mochi extra fun — especially for parties or holidays — use cookie cutters. Heart shapes for Valentine’s Day, stars for birthdays, or little flowers for springtime. Just make sure to dust the mochi and cutters well with potato starch so nothing sticks.
Easy Homemade Mochi (Chi Chi Dango)
This simple chi chi dango recipe is one of the easiest and most delicious mochi desserts out there. Naturally gluten-free, vegan, and made with just four main ingredients. Instructions are provided for baking in the oven, but it can also be prepared in the microwave.
Ingredients
- 1 1/2 cups mochiko (sweet rice flour), about 8 oz
- 1 cup sugar
- 1/2 cup water (see note below)
- 1/2 can (13.5 oz) coconut milk, about 200mL or 3/4 cup
- 1 drop food coloring (optional)
- Potato starch (katakuriko), for dusting
Instructions
- Preheat oven to 350°F and grease an 8×8-inch baking dish. A glass dish is preferred to minimize sticking.
- Mix mochiko, sugar, coconut milk, water, and food coloring (if using) until fully combined.
- Pour the mixture into the baking dish and cover tightly with aluminum foil.
- Bake for 45–55 minutes or until fully set. See notes for microwave instructions.
- Let cool completely. Once cooled, dust with potato starch to prevent sticking. Slice into rectangles using a plastic knife or pizza cutter, continuing to dust with starch as needed.
- Store in a sealed container at room temperature for a few days.
Notes
- This recipe can be doubled to fit a 9×13-inch pan. Use a full 16 oz box of mochiko and an entire can of coconut milk. Bake for at least one hour.
- For microwave version: pour batter into a greased plastic microwave bundt pan. Cover with plastic wrap and microwave on high for 8–9 minutes. Let cool, then slice as instructed.
- Do not substitute other types of rice flour for mochiko.
- An earlier version of this recipe used 1 cup of water, which worked for years. However, recent results have been too watery, possibly due to changes in coconut milk (such as a shift toward organic products). Reducing water to 1/2 cup has restored consistency. If using coconut milk with added emulsifiers, 1 cup of water may still work. For organic versions, stick to 1/2 cup.
Nutrition Information:
Yield: 24 Serving Size: 1Amount Per Serving: Calories: 38Total Fat: 0gSaturated Fat: 0gTrans Fat: 0gUnsaturated Fat: 0gCholesterol: 1mgSodium: 4mgCarbohydrates: 9gFiber: 0gSugar: 9gProtein: 0g
Asianplated.com, occasionally offers nutritional information for recipes contained on this site. This information is provided as a courtesy and is an estimate only. This information comes from online calculators. Although allchickenrecipes.com attempts to provide accurate nutritional information, these figures are only estimates.
FAQs About Chi Chi Dango
Can I use regular rice flour instead of mochiko?
No, it won’t work the same way. Regular rice flour doesn’t give that chewy texture we love in mochi.
What can I use instead of coconut milk?
You can use regular milk or a dairy-free milk like almond or oat, but coconut milk gives the best texture and subtle flavor.
Why is my mochi too hard or dry?
It may have baked uncovered or been left out too long. Always cover it well while baking and store it properly afterward.
Can I color mochi naturally?
Absolutely! Beet juice gives a soft pink hue, matcha powder adds green, and turmeric makes it golden yellow.
How to Serve Chi Chi Dango
You can enjoy chi chi dango on its own, tucked into bento boxes, or served alongside tea. I also like offering it with fresh fruit or alongside other Japanese sweets during holidays or special gatherings. Kids especially love the fun shapes!
Try other recipes: