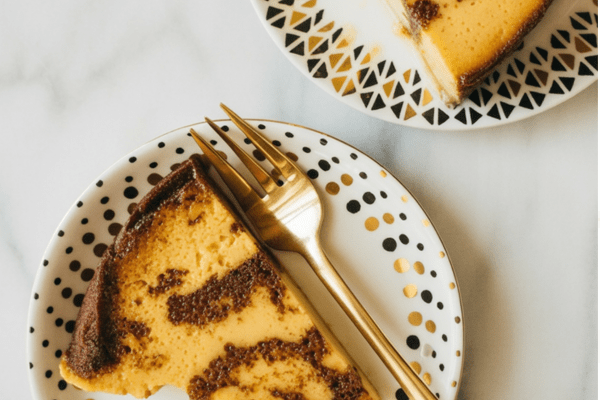
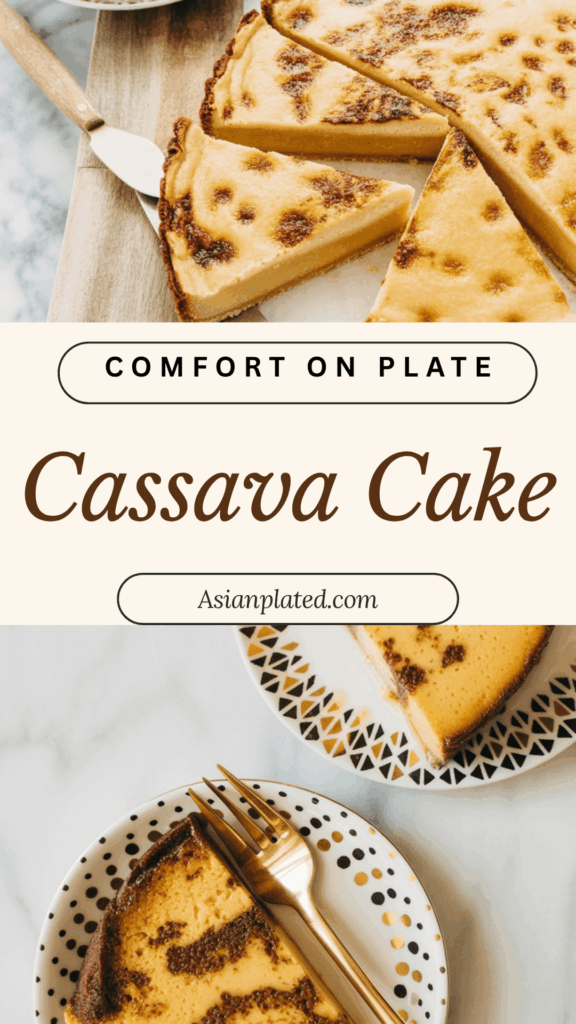
This traditional Filipino cassava cake is one of those sweet treats that feels like comfort on a plate. It’s soft, a little chewy, rich with coconut milk, and finished with a golden custard topping that’s just begging to be sliced into. The cake itself is naturally gluten-free and reminds me a lot of butter mochi—but with its own tropical twist.

What is Cassava Cake?
Cassava cake is a classic Filipino merienda or dessert made with grated cassava (also called yuca), coconut milk, sweetened condensed milk, and eggs. Once baked, it’s topped with a creamy custard that bubbles and browns under the broiler. The texture? Think soft yet chewy—like a cross between mochi and flan. And it’s completely flourless, thanks to the starchy cassava root.
If you enjoy desserts like butter mochi, Japanese daifuku, or even bubble tea pearls, this cake is right up your alley. It’s subtly sweet, deeply creamy, and wonderfully nostalgic.
Why I Love Making This Cassava Cake
This recipe is my take on the cassava cake many Filipino families grew up with—except I’ve streamlined it a bit for modern kitchens. Traditionally, these cakes were made by instinct: no measurements, no timers. Just touch, taste, and memory. My version keeps all the flavor and feeling but adds precision, so anyone can make it confidently.
Here’s what makes this version worth trying:
- It’s naturally gluten-free — no flour needed.
- Quick to put together — the batter comes together in under 10 minutes.
- Crowd-pleasing — chewy, custardy, and totally addictive.
What Cassava Cake Tastes Like
Cassava itself doesn’t have a strong flavor—it’s mild and starchy, like potato. So what you’ll really taste here is the rich combination of coconut milk, condensed milk, and eggs. The cake is just sweet enough, slightly creamy, with a springy bite that makes every forkful satisfying.
The magic, though, is in the contrast between the chewy cake and that silky custard top. It’s a texture lover’s dream.
Ingredients You’ll Need
Here’s your simple shopping list:
- Granulated sugar
- Kosher salt (or use half the amount if using table salt)
- Large eggs
- Canned coconut milk
- Evaporated milk
- Frozen grated cassava (look for it in Asian grocery stores)
- Sweetened condensed milk
- Pure vanilla extract
- Unsalted butter
Notes on Key Ingredients
- Cassava: I always go for frozen grated cassava for ease. If you only find whole or cubed cassava, you’ll need to grate it yourself (a bit of a workout, honestly).
- Coconut Milk: Use full-fat canned coconut milk. Shake it well before using, as the cream tends to separate.
- Milk Cans: You’ll divide both the coconut milk and evaporated milk—half goes into the cake, half into the custard topping.
Step-by-Step Instructions
1. Prep Your Ingredients (5 minutes)
Let the frozen cassava thaw overnight in the fridge. Shake your cans of coconut milk and evaporated milk well, then divide each in half. Set everything out before you start mixing.
2. Make the Cake Batter (5 minutes)
In a large bowl, whisk together sugar, salt, eggs, half the coconut milk, half the evaporated milk, all the grated cassava, sweetened condensed milk, vanilla extract, and melted butter. That’s your batter—no need for mixers or fancy tools.
3. Bake the Cake (40 minutes)
Pour the batter into a greased 9- or 10-inch round cake pan or springform. Bake at 350°F for about 40 minutes. You’ll know it’s ready when the edges look set and a skewer in the center comes out mostly clean.
4. Make the Custard Topping (less than 5 minutes)
While the cake is baking, whisk the remaining coconut milk, evaporated milk, and one egg in a small bowl. That’s your topping—simple but rich.
5. Broil to Finish (15 minutes)
Once the cake is done, pour the custard topping gently over the top. Broil until the surface is golden brown, slightly blistered, and jiggly. Keep a close eye—it can go from perfect to burnt fast.
Equipment Tips
- I like using a springform pan for easy slicing and serving.
- Avoid glass pans if you plan to broil—the temperature change can cause them to crack.
- If your broiler has LOW and HIGH settings, use LOW. If not, just keep a close watch and rotate the pan if needed to avoid burning.
Serving Suggestions
You can serve cassava cake warm, at room temperature, or chilled. I personally love it chilled—it firms up beautifully in the fridge and tastes like a tropical custard bar.
To warm up individual slices, microwave for about 15–20 seconds until just soft.
Cut into small squares or wedges and serve with coffee, tea, or even as a dessert after dinner. It also travels well if you’re sharing with friends or bringing to potlucks.
Storage and Make-Ahead Tips
- Fridge: Store covered in the fridge for up to 5 days. The texture stays nice and chewy.
- Freezer: Yes, you can freeze it! Bake the base, cool it completely, then wrap tightly in plastic wrap. Freeze for up to 3 months. When ready to serve, thaw overnight in the fridge, add the custard topping, and broil as directed.
- Batch Tip: If you want to freeze, make it in a disposable foil pan so you’re not tying up your good bakeware for weeks.
Frequently Asked Questions
Can I use fresh cassava instead of frozen?
Yes, but you’ll need to peel and grate it yourself. Be sure to remove any woody or fibrous core.
Is this dessert super sweet?
It’s sweet, but not overwhelmingly so. The richness of the coconut and the custard balance it nicely.
Can I make this dairy-free?
You could try swapping evaporated milk with coconut cream and sweetened condensed milk with coconut condensed milk, but I haven’t tested it. Texture may vary slightly.
Why is my cake too soft to cut?
It probably hasn’t cooled enough. Let it sit at least an hour after baking so it firms up properly.
Cassava Cake

Cassava cake is a traditional Filipino snack cake made with grated cassava, coconut milk, and topped with a layer of molten custard. It has a soft, slightly chewy texture similar to Hawaiian mochi butter cake and is naturally gluten-free.
Ingredients
For the Cassava Cake:
- 1 ½ cups (10.5 ounces or 298 grams) granulated sugar
- ¼ teaspoon kosher salt
- 2 large eggs
- Scant 1 cup (7 ounces or 198 grams) canned coconut milk (reserve the rest for the topping)
- ¾ cup (6 ounces or 170 grams) evaporated milk (reserve the rest for the topping)
- 1 (16-ounce) pack frozen grated cassava, thawed overnight and drained if needed
For the Custard Topping:
- Scant 1 cup (7 ounces or 198 grams) canned coconut milk
- ¾ cup (6 ounces or 170 grams) evaporated milk
- ¼ cup (2.5 ounces or 71 grams) sweetened condensed milk
- 1 large egg
- 1 teaspoon pure vanilla extract
- 2 tablespoons (1 ounce or 28 grams) unsalted butter, melted
Instructions
- Make the Cassava Cake:Preheat the oven to 350°F and position a rack in the center. Spray a 9- or 10-inch round springform cake pan with cooking spray and set it in the middle of a parchment-lined half sheet pan.
- In a medium bowl, whisk together the sugar, salt, and eggs. Add the coconut milk and evaporated milk, then whisk to combine. Stir in the grated cassava.
- Pour the batter into the prepared pan. Smooth the top with an offset spatula if needed.
- Bake for 45 to 50 minutes, or until the edges are set and the center springs back when lightly pressed. A skewer inserted should come out with a few moist crumbs. Let it cool slightly on a wire rack.
- Prepare the Custard Topping:Move a rack close to the broiler and preheat for 10 minutes.
- In a medium bowl, whisk together the remaining coconut milk, evaporated milk, condensed milk, egg, and vanilla. Pour this mixture over the baked cassava cake, then drizzle the melted butter on top.
- Broil the Cake:Broil for 15 to 20 minutes, or until the custard topping bubbles and becomes mottled and golden. Allow the cake to cool completely on a wire rack.
- Serve and Store:Run an offset spatula around the edge to release the sides of the pan. Slice and serve warm or at room temperature. Store loosely covered at room temperature for up to 1 day. After that, transfer to an airtight container and refrigerate for up to 5 days.
Nutrition Information:
Yield: 1 Serving Size: 1Amount Per Serving: Calories: 1889Total Fat: 142gSaturated Fat: 110gTrans Fat: 1gUnsaturated Fat: 23gCholesterol: 652mgSodium: 982mgCarbohydrates: 122gFiber: 4gSugar: 35gProtein: 44g
Asianplated.com, occasionally offers nutritional information for recipes contained on this site. This information is provided as a courtesy and is an estimate only. This information comes from online calculators. Although allchickenrecipes.com attempts to provide accurate nutritional information, these figures are only estimates.
Final Tips Before You Bake
- Shake your milk cans well before using.
- Split the coconut and evaporated milk carefully so you have enough for both the cake and custard.
- Don’t walk away while broiling—check every 5 minutes.
- If you’re baking in a different pan size, adjust the baking time accordingly.
This cassava cake is pure comfort. It’s got that chewy-moist base and a rich custardy top—perfect for anyone who loves textures and flavors that linger. I grew up eating desserts like this, and every bite takes me back. I hope it becomes one of those go-to treats in your kitchen too.
Try other recipes: