If there’s one Korean recipe I absolutely had to get right after going plant-based, it was kimchi. It’s not just a side dish—it’s the heart of every Korean table. I’ve grown up with it in every meal, from rice porridge breakfasts to late-night ramyeon bowls. So when I decided to veganize it, it had to taste just like my childhood—minus the fish sauce.
This version is an easy, approachable take on traditional mak kimchi, or what I lovingly call “careless kimchi.” It skips the fuss but keeps all the flavor. It’s the one I make regularly at home, and it never lasts long in the fridge.
What is Kimchi, Really?
Think of kimchi as Korea’s favorite pickle—but not just one kind. There are over 200 varieties! The kind most people know is the bright red, spicy Napa cabbage version. But there’s also white kimchi, radish kimchi, cucumber kimchi… Honestly, you can kimchify almost any vegetable.
In our house, kimchi was non-negotiable. My dad even had it with toast once—yes, toast. He said it gave it a nice crunch. Growing up with that kind of devotion, I learned quickly that the good stuff had to be salty, a little sweet, tangy, and crunchy. If it’s just one of those things? It’s missing the magic.
What Does Homemade Kimchi Taste Like?
If you’ve never had it before, imagine sauerkraut and bread-and-butter pickles had a wild, spicy baby. It’s briny, garlicky, and sour, with a hit of umami. And the crunch? That’s what keeps you coming back for bite after bite.
I like mine slightly sweet, my mom likes hers super salty, and a friend of mine won’t eat it unless it’s eye-wateringly sour. That’s the beauty of making it yourself—you can tweak it until it’s perfect for you.
Why This Vegan Kimchi is Worth Making
Let’s keep it real—this recipe is:
- Straightforward
- No animal products
- Full of flavor
- Totally customizable
It’s based on mak kimchi, which just means it’s chopped and tossed instead of layered leaf by leaf. It’s less effort, less mess, and way more weeknight-friendly. You’ll get about two big jars from one batch—one for now, one to forget in the fridge until it hits peak sour and becomes kimchi stew gold.
Is Kimchi Actually Healthy?
Absolutely. This stuff is good for your gut, your taste buds, and your veggie intake. It’s naturally packed with probiotics from fermentation, and all the garlic, ginger, and cabbage bring along fiber and antioxidants.
Worried about the salt? It’s crucial to the fermentation process, but studies suggest it doesn’t cause hypertension when eaten as part of a balanced diet. Plus, vegan kimchi tends to ferment slower and lasts longer, giving you more control over how tangy you want it.
Key Ingredients & Smart Swaps
Napa cabbage – The classic base. You can sub with green or Savoy cabbage, but fermentation time may change.
Sea salt – Coarse sea salt or kosher salt works great. It pulls moisture from the cabbage and helps kickstart fermentation.
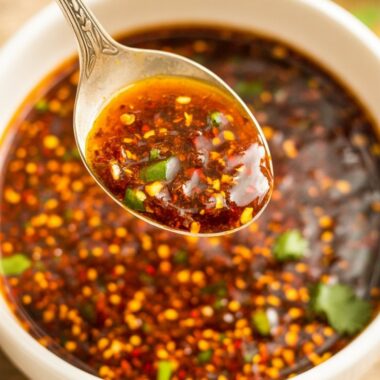
Gochugaru – Korean red chili flakes. Don’t swap it with paprika if you want authentic flavor. A mix of cayenne and smoked paprika in a pinch, but it won’t be quite the same.
Apple or Korean pear – Adds sweetness and helps ferment. Fuji apples or honeycrisp work well.
Korean radish (mu) – Adds crunch. Daikon is a fine backup.
Vegan fish sauce – Adds that deep umami kick. A strong soy sauce or Yondu can work, but it won’t hit the same flavor notes.
Plum syrup – Sweet and tart. Sub with maple syrup or brown rice syrup.
Glutinous rice flour – Used to make the sticky paste that carries the seasoning. Cooked white rice can work in a blender if you’re in a bind.
Tools That Make the Process Smoother
- Large mixing bowls – You’ll need space to salt, rinse, and mix everything.
- Big colander – For draining cabbage.
- Blender or food processor – For the sauce paste.
- Small saucepan – To make the rice flour paste.
- Mason jars – Two half-gallon jars or several smaller ones to pack your kimchi.
Step-by-Step: How I Make Vegan Kimchi at Home
Step 1: Salting the Cabbage
Cut the cabbage into bite-sized chunks. Soak them in salted water and sprinkle more salt in layers. Flip the pile halfway through to make sure every leaf gets evenly brined.
How do I know it’s ready? The leaves should be bendy and taste too salty even after rinsing. Once they’re ready, rinse thoroughly in cold water and pat them dry.
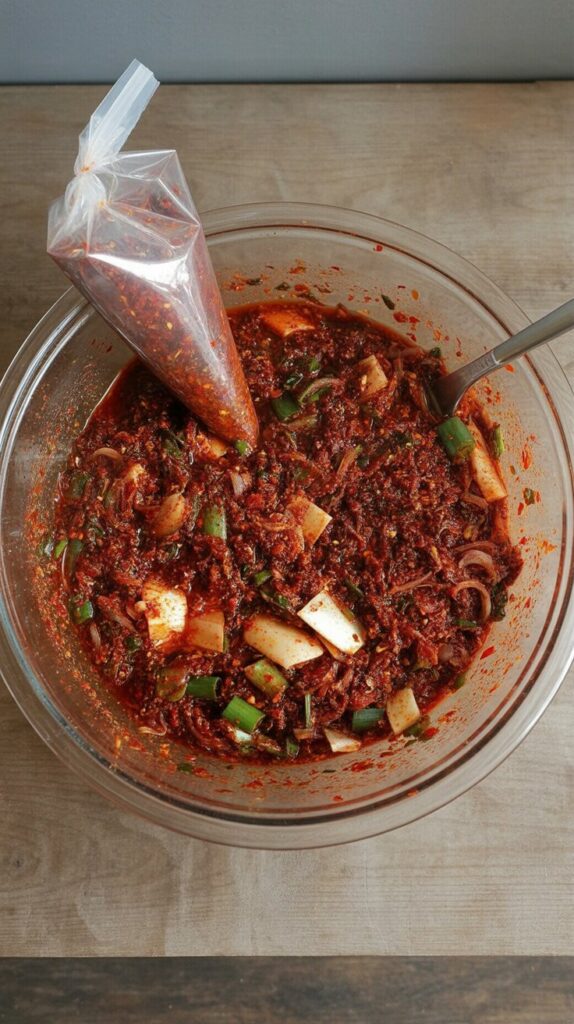
Step 2: Making the Sauce
I always start with the rice flour paste—just sweet rice flour and water, cooked until thick and gooey. Let it cool.
Then, I julienne my carrots, chop daikon and scallions, and blend up the garlic, ginger, onion, and apple with syrup. Once that’s all prepped, I mix it all in a big bowl with the cooled rice paste, gochugaru, and vegan fish sauce.
Taste and adjust. Want it saltier? Add more vegan fish sauce. Want it sweeter? A splash more plum syrup.
Now toss that sauce into your cabbage until everything is generously coated.
Step 3: Packing and Fermenting
Pack the coated cabbage tightly into jars. Press it down to get rid of air pockets. If there’s extra sauce, pour it on top. Sprinkle a little extra salt if there’s air space.
Leave one jar at room temp for 24 hours to get fermentation going. Pop the rest straight into the fridge to slow things down for later. After 4 to 10 days, you’ll hit your perfect flavor zone.
How I Store My Kimchi
After that initial day on the counter, everything goes into the fridge. Around week two, it’s usually perfect—still crunchy, deeply flavorful, and not too sour.
But here’s a tip: Once it crosses that super-sour line? Don’t toss it. That’s when it’s perfect for stews, pancakes, and fried rice. Nothing goes to waste here.
What to Do If Something Feels Off
Too bland? Probably under-salted. Add a spoon of salt on top and give it a few days.
Too salty? Mix in more chopped radish—it soaks up extra salt like a charm.
White film on top? It’s yeast, not mold. Scoop it out and you’re good. Make sure your kimchi is submerged and in an airtight jar next time.
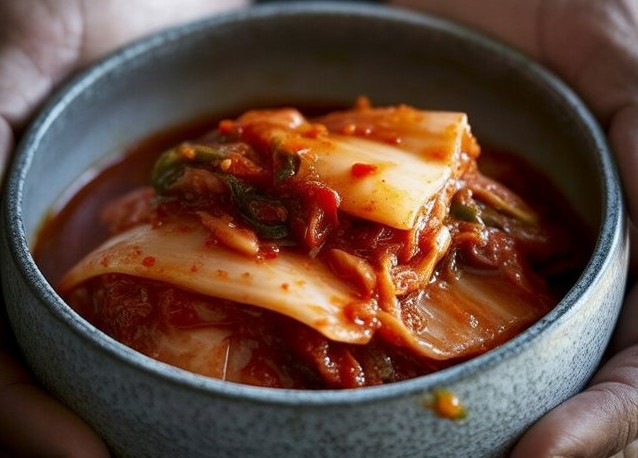
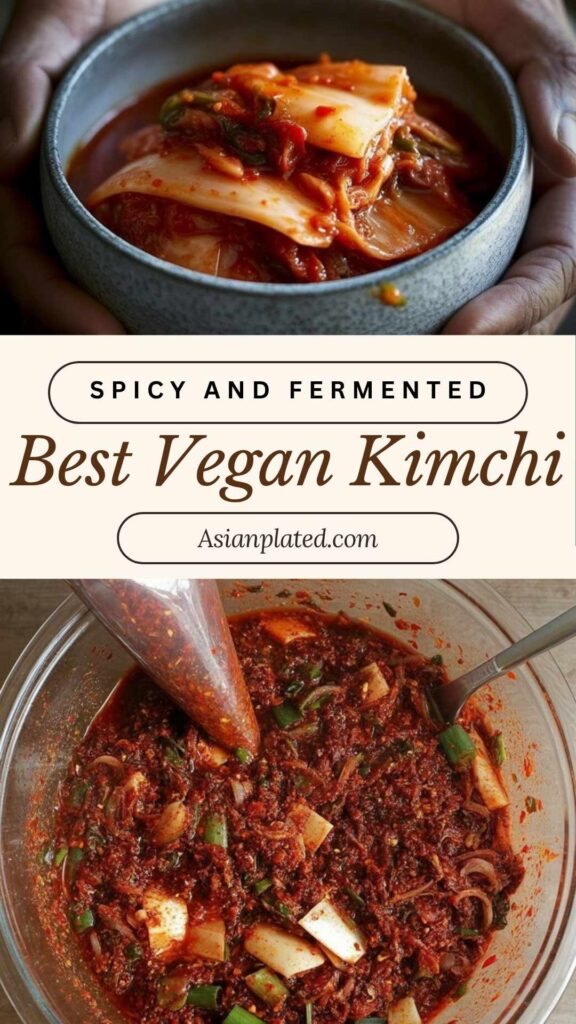
Best Vegan Kimchi
This homemade vegan kimchi is crunchy, spicy, and full of depth—just the way it should be. It's the perfect beginner-friendly recipe if you’ve been wanting to try your hand at fermenting cabbage Korean-style, minus the fish sauce.
Ingredients
- 2 heads Napa cabbage (around 4 to 6 pounds)
- 2 ½ cups kimchi salt (or coarse sea salt)
- 6 cups water (for soaking)
- 1 thumb-sized piece of ginger, peeled
- ½ cup garlic cloves
- ½ cup chopped onion
- ½ cup white part of scallions, roughly chopped
- 1 ½ cups chopped apple (or Asian pear)
- ¼ cup glutinous rice flour
- ½ cup vegan fish sauce (or soy sauce)
- ¼ cup plum syrup (or maple syrup, brown rice syrup, or sugar)
- 2 cups julienned carrot
- 2 cups Korean radish or daikon, cut into ¼-inch thick half moons
- 2 cups scallion greens, chopped into 2-inch pieces
- 3 cups gochugaru (Korean red pepper flakes)
Instructions
- Salt the Cabbage : Start by removing the tough stem ends of your Napa cabbages. Cut a small slit into the root end and then gently pull the cabbage apart into halves, then quarters. Slice into chunky bite-sized pieces.
- Dissolve 1 cup of salt in 6 cups of water. In a large mixing bowl, layer the cabbage pieces, sprinkling a portion of the dry salt and pouring in some of the saltwater as you go. Repeat until all the cabbage is salted and moistened.
- Let this sit for about 90 minutes to 2 hours until the leaves begin to wilt. Toss the cabbage to rotate the top and bottom layers, and let it sit again until the leaves are fully softened—this may take up to 4 hours. Test by bending the thickest part of a leaf; it should flex easily.
- Rinse the salted cabbage thoroughly under cold water to remove excess salt, then drain well.
- Make the Sauce : In a small pot, whisk together the glutinous rice flour and 1½ cups of water over medium heat until it thickens into a paste (about 3 minutes). Let it cool.
- Blend together the apple, onion, scallion whites, garlic, ginger, and plum syrup until smooth. In a large bowl, combine this puree with the cooled rice paste, gochugaru, vegan fish sauce, chopped radish, scallion greens, and carrots. Mix well until it forms a thick, vibrant red sauce.
- Combine and Pack : Using gloves, massage the sauce into the drained cabbage until every leaf is coated. Pack the kimchi tightly into clean mason jars, pressing down firmly to eliminate air pockets. Leave a little room at the top of each jar, and if there’s extra space, sprinkle a pinch of salt to prevent yeast from forming.
- Ferment and Store : Leave the jars out at room temperature for 24 hours, then move them to the fridge. The kimchi will start tasting great by day 3 or 4, but if you can wait a couple of weeks, the flavor really deepens.
Notes
- Serve alongside rice, noodle dishes, or inside vegan bibimbap bowls.
- Add to stews, pancakes, or stir-fries for a bold kick of flavor.
- The longer it ferments, the tangier it gets—adjust to your taste!
Nutrition Information:
Yield: 16 Serving Size: 1Amount Per Serving: Calories: 91Total Fat: 0gSaturated Fat: 0gTrans Fat: 0gUnsaturated Fat: 0gCholesterol: 0mgSodium: 889mgCarbohydrates: 20gFiber: 3gSugar: 6gProtein: 3g
Asianplated.com, occasionally offers nutritional information for recipes contained on this site. This information is provided as a courtesy and is an estimate only. This information comes from online calculators. Although allchickenrecipes.com attempts to provide accurate nutritional information, these figures are only estimates.
Quick Answers to Common Questions
What’s in vegan kimchi?
Cabbage, radish, gochugaru, garlic, ginger, fruit, and vegan fish sauce.
Why isn’t all kimchi vegan?
Most traditional recipes use anchovy sauce or shrimp paste.
Does vegan kimchi still have probiotics?
Yep. The fermentation process is the same.
Can I use cooked rice instead of rice flour?
Yes—blend 1/4 cup cooked rice with the rest of the sauce ingredients.
Is there a non-spicy version?
Absolutely. Try baek kimchi (white kimchi)—no chili flakes, just salt-brined goodness.
This version of kimchi has become a fridge staple in my kitchen. Whether I’m eating it cold with rice or tossing it into a bubbling pot of stew, it never disappoints. It’s deeply familiar, endlessly adaptable, and always satisfying. I hope it becomes part of your kitchen, too.
Try other Korean recipes: